How To Choose The Best Datacenter Location For Your Server
First of all, who is your audience? Where are they located geographically? If you are located in the same location as your target audience, or you have access to a server in that location, then there are tools that can help you make the right choice. To determine which location is best, you can use the following information to test the ping, traceroute, and download times of each datacenter.
| Washington (West Coast Datacenter) | Atlanta (Primary Datacenter) | Amsterdam (European Datacenter) |
| 108.160.156.18 | 64.74.200.107 | 209.42.255.73 |
| Download test file | Download test file | Download test file |
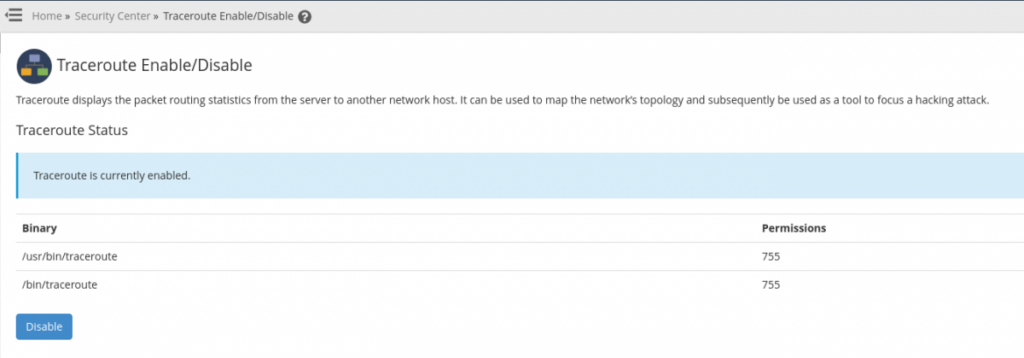
If you are testing from a cPanel server, then you may need to enable traceroute in that server via WHM >> Home >> Security Center >> Traceroute Enable/Disable. The following indicates a server with Traceroute enabled.

Traceroute/Tracert
Traceroute is a network diagnostic tool that shows the path packets take from one location to another. It measures transit time and delays of packets across the network. Each successive host in transit is called a hop, and the cumulative time it takes to transverse each of these to make the connection to the destination is the total time required to establish the connection from the source to the destination. This tool can be useful in troubleshooting firewall blocks and other networking issues.
On Unix-like systems traceroute is available as a command line tool. Simply access your command line from the location that you want to test from, and then run the traceroute command. In the following, example.com represents the target to test.
traceroute example.comIf you are testing the Atlanta location, then you will use the following command:
traceroute 170.249.238.168 The successful output will resemble the following

On Microsoft Windows, it is named tracert and can be accessed via Windows Start » Command Prompt. If you are using macOS, you can access traceroute via its Network Utilities.
Ping
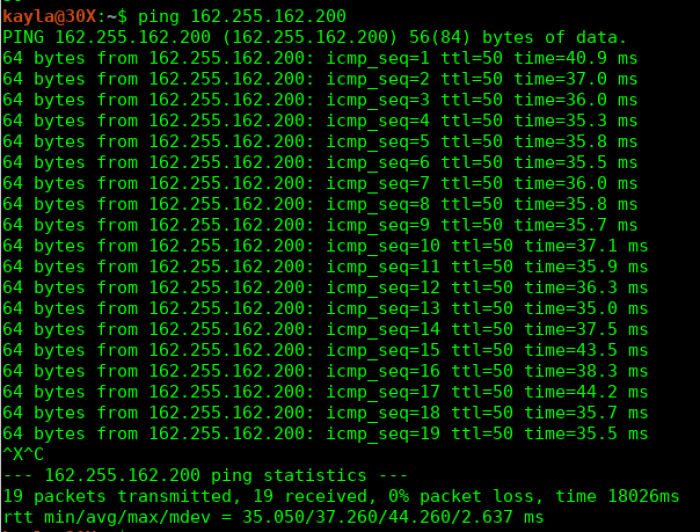
ping is great for detecting packet loss when troubleshooting a network connection. Ping operates by sending Internet Control Message Protocol echo request packets to the target host and waiting for an ICMP echo. A Statistical summary of the results typically includes the minimum, maximum, the mean round-trip times, and standard deviation of the mean. You can see how this can be utilized to test each location.
This command is available on unix-like systems via the command line and on Windows via Windows Start » Command Prompt. If you are using macOS, you can access ping via its Network Utilities.

Download Speed
If you are familiar with the command line, there are several commands one can use to test how long it takes for files to be retrieved from these servers to your location. Two of these commands would be wget and curl. To use wget for a quick overview of the amount of total time required to retrieve the file, you would simply enter the command followed by the location of the file you want to download, like so:
For Linux:
wget -O /dev/null fileFor Windows:
wget -O NUL fileYou will need to replace the file with the actual URL of the file that is being tested. This can be found by left-clicking on the “Download Test File” link in the Knownhost file links above and then selecting the option to copy the link location. You will then replace the file with the link location you just copied. Here is the result of a test to the former Texas location:

If you were to test the download speed thoroughly, curl is a great option. Curl allows for making a custom file to format your output. The options that you may be most interested in using when testing download speed are the following:
speed_downloadThe average download speed that curl measured for the complete download. Bytes per second.time_connectThe time, in seconds, it took from the start until the TCP connect to the remote host (or proxy) was completed.time_totalThe total time, in seconds, that the full operation lasted.
For more information about how to construct to the custom format file to print only these options, you can refer to the manpage here:
If you were to test using the download link for Amsterdam, you would first create the custom file like so:
nano curl-format.txtAdd the following to the file and save:
  speed_download: %{speed_download}\n
  time_connect: %{time_connect}\n
  time_total:  %{time_total}\n
Next, you would construct your curl command as follows:
curl -w "@curl-format.txt" -o /dev/null -s http://209.42.192.35/test.binHere are the results of the location that is geographically furthest away from me:

That’s not bad for the connection having to cross the ocean and travel to the other side of the globe!
Conclusion
Now that you are familiar with different tools for testing the network, you can test the hops, imcps, and seconds from your visitor’s location to your server. All that needs to be done now is to test all available locations using these methods, compare, and then make a determination of the best datacenter for you and your clients. Most of the time, it is going to be the datacenter geographically closest to you. With these tools, you can ensure you are making the right choice rather than following this generalization, though. You now know how to test the network and determine the best datacenter location for you and your users.