PHP OPcode Cache Install Guide
Overview
Each time when PHP script executes on the server it goes through the following stages: tokenizing, parsing, compilation, and interpretation. PHP opcode caching allows skipping the first 3 stages by storing pre-compiled scripts in shared memory and reusing them. This significantly increases the performance of running PHP scripts.
It is important to know that opcode cache works only with certain types of PHP handlers. Among those available in cPanel handlers it works with: * DSO (mod_php) * fcgid * PHP-FPM
Opcode cache DOES NOT work with following handlers: * SUPHP * CGI
There were historically several implementations of opcode cache available for cPanel: * APC * APCu * eAccelerator * xCache * Zend OPcache
In latest PHP versions only Zend OPcache and APCu are supported.
Zend OPcache
Zend OPcache caches only opcode.
How to check if Zend OPcache is installed or not
Run the command:
php -v
If EasyApache3 is used, the output will show you for sure whether OPcache is used. For example:
  # php -v
  PHP 5.6.36 (cli) (built: May 29 2018 01:54:47)
  Copyright (c) 1997-2016 The PHP Group
  Zend Engine v2.6.0, Copyright (c) 1998-2016 Zend Technologies with the ionCube PHP Loader (enabled) + Intrusion Protection from ioncube24.com
  (unconfigured) v6.1.0 (), Copyright (c) 2002-2017, by ionCube Ltd.with Zend OPcache v7.0.6-dev, Copyright (c) 1999-2016, by Zend Technologies
However, if EasyApache 4 is being used and several PHP versions are installed, ‘php -v’ command displays only default PHP version. You could run the following command to see installed opcache modules:
yum list -q installed ea-php*opcacheIf the result is empty then no opcache modules are installed.
Installation and configuration of Zend OPcache on EasyApache 3
EasyApache 3 requires rebuilding to add/remove modules. Run:
/scripts/easyapacheThen follow the menu, enter “Customize Profile” section, find “Zend Opcode caching extension” entry in Exhaustive Options List, select it, then save configuration and start rebuilding process.
Installation and configuration of Zend OPcache on EasyApache 4
EasyApache 4 moved to RPM-based model and does not require entire rebuilding each time when you need add or remove a module. It is managed by running yum command. For example, if you need to install opcache module for PHP 7.0, run:
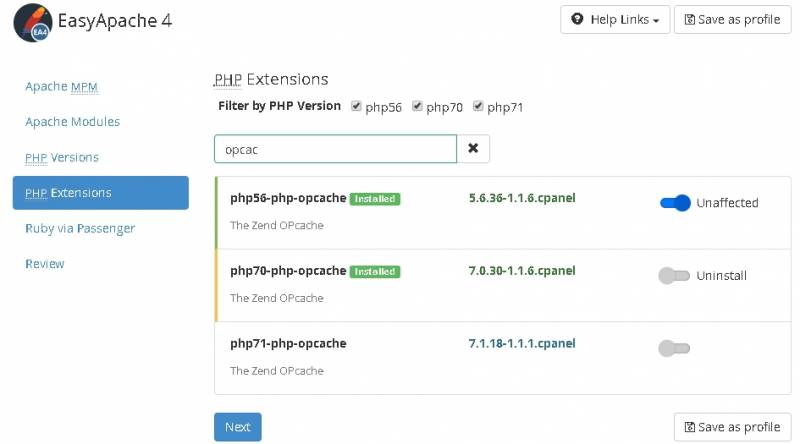
yum install -y -q ea-php70-php-opcacheIn WHM interface opcache module could be added from (Home » Software » EasyApache 4). Click on “Customize” button, enable opcache module on “PHP extensions” sections, and apply the changes.

Zend OPcache configuration
In EasyApache 3 all PHP settings including opcache parameters are located in one configuration file. In EasyApache 4 each module has its own configuration file for each installed PHP version. By running ‘php –ini’ you can find out the location of that file. For example, in EasyApache 4 and PHP 5.6 it would be:
/opt/cpanel/ea-php56/root/etc/php.d/opcache.iniHere’s default settings:
  # grep opcache /opt/cpanel/ea-php56/root/etc/php.d/opcache.ini
  zend_extension=opcache.so
  opcache.enable=1
  ;opcache.enable_cli=0
  opcache.memory_consumption=128opcache.interned_strings_buffer=8
  opcache.max_accelerated_files=4000
  ;opcache.max_wasted_percentage=5
  ;opcache.use_cwd=1
  ;opcache.validate_timestamps=1
  ;opcache.revalidate_freq=2
  ;opcache.revalidate_path=0
  ;opcache.save_comments=1
  ;opcache.load_comments=1
  opcache.fast_shutdown=1
  ;opcache.enable_file_override=0
  ;opcache.optimization_level=0xffffffff
  ;opcache.inherited_hack=1
  ;opcache.dups_fix=0
  opcache.blacklist_filename=/opt/cpanel/ea-php56/root/etc/php.d/opcache*.blacklist
  ;opcache.max_file_size=0
  ;opcache.consistency_checks=0
  ;opcache.force_restart_timeout=180
  ;opcache.error_log=
  ;opcache.log_verbosity_level=1
  ;opcache.preferred_memory_model=
  ;opcache.protect_memory=0
  opcache.validate_permission=1
You can see that by default OPcache is enabled but disabled for CLI version of PHP. You could also notice that validate_permission is turned on which is important in shared environments. Detailed description for each parameter is available at: * php.net/manual/en/opcache.configuration.php
To view the current settings you can also run:
php -i|grep ^opcacheOr for non-default PHP version:
scl enable ea-php70 'php -i|grep ^opcache'opcache-gui
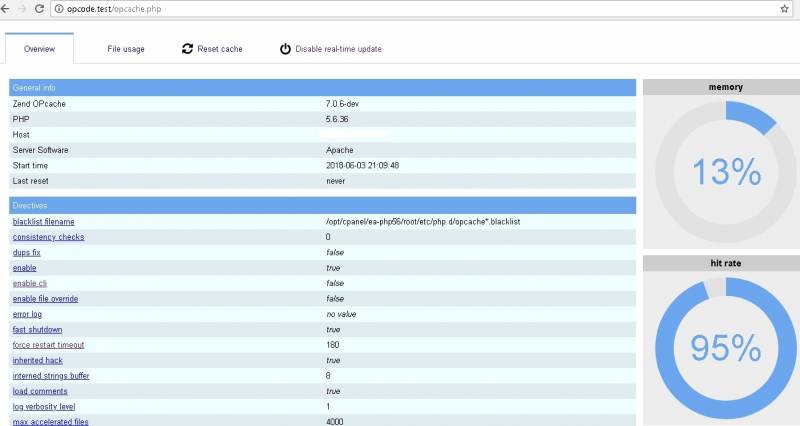
This is a useful tool for monitoring OPcache performance. The site of the project: GitHub Link
Just copy the file index.php (of course with renaming it to, for instance, opcache.php) to site’s root directory and open in the browser.

APCu
APC User Cache. Does not cache actual opcode like Zend OPcache and APC. Instead, it caches user data which allows it to run alongside Zend OPcache. Source code of the project is located at: * pecl.php.net/package/APCu
Installation on EasyApache 3
Also performed via PECL, for example
pecl install channel://pecl.php.net/APCu-4.0.11Installation on EasyApache 4
You can install APCu for particular PHP version in EA4 using following example
/opt/cpanel/ea-php70/root/usr/bin/pecl install channel://pecl.php.net/APCu-5.1.11APCu version 5.X requires PHP 7.0+ to run while version 4.X could be installed on PHP 5.5 and 5.6.
To check APCu module run:
  #scl enable ea-php70 'php -m|grep apc'
  apcu
Using APCu
Since APCu caches only user data, its usage should be implemented in code (instead of opcode caching which is ready to go after installation). There are plugins for CMS like WordPress which allow easily to get apcu running. For example, APCu Object Cache Backend plugin. Install it from available plugins in WordPress panel. Then move php script inside document root:
mv wp-content/plugins/apcu/object-cache.php wp-content/object-cache.phpMonitoring APCu
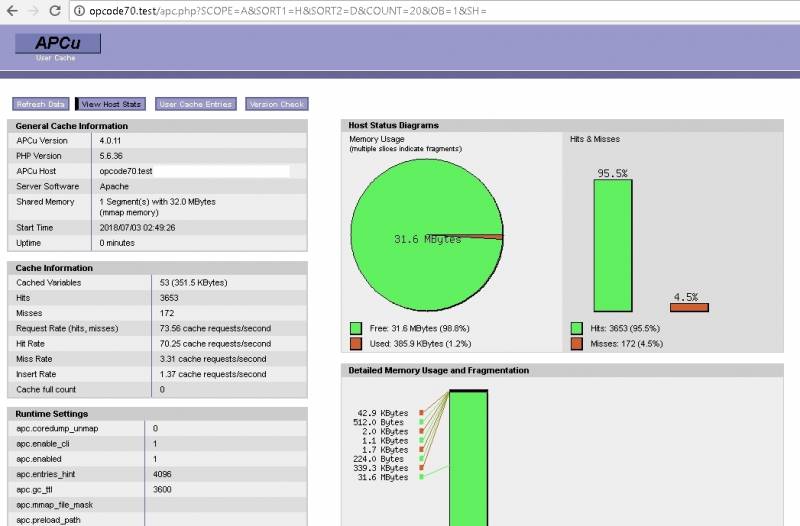
There’re several well-known scripts which use function apcu_cache_info() to monitor cache usage. An example of such tool is described at: anavarre.net/how-to-monitor-and-tune-apcu/
Download the php script in site’s document root. Then open it in a browser and you could see the current cache usage.
