How to upgrade or downgrade a package in KnownHost?
We understand the importance of the flexibility of the services. So, to provide you the flexibility as much as possible, we are continually working on it. KnownHost offers their customers the in-built control of upgrading and downgrading the current package through the billing portal. Now, you no longer need to open a ticket and wait for a queue to get served. Let’s learn how to upgrade/downgrade a package in KnownHost.
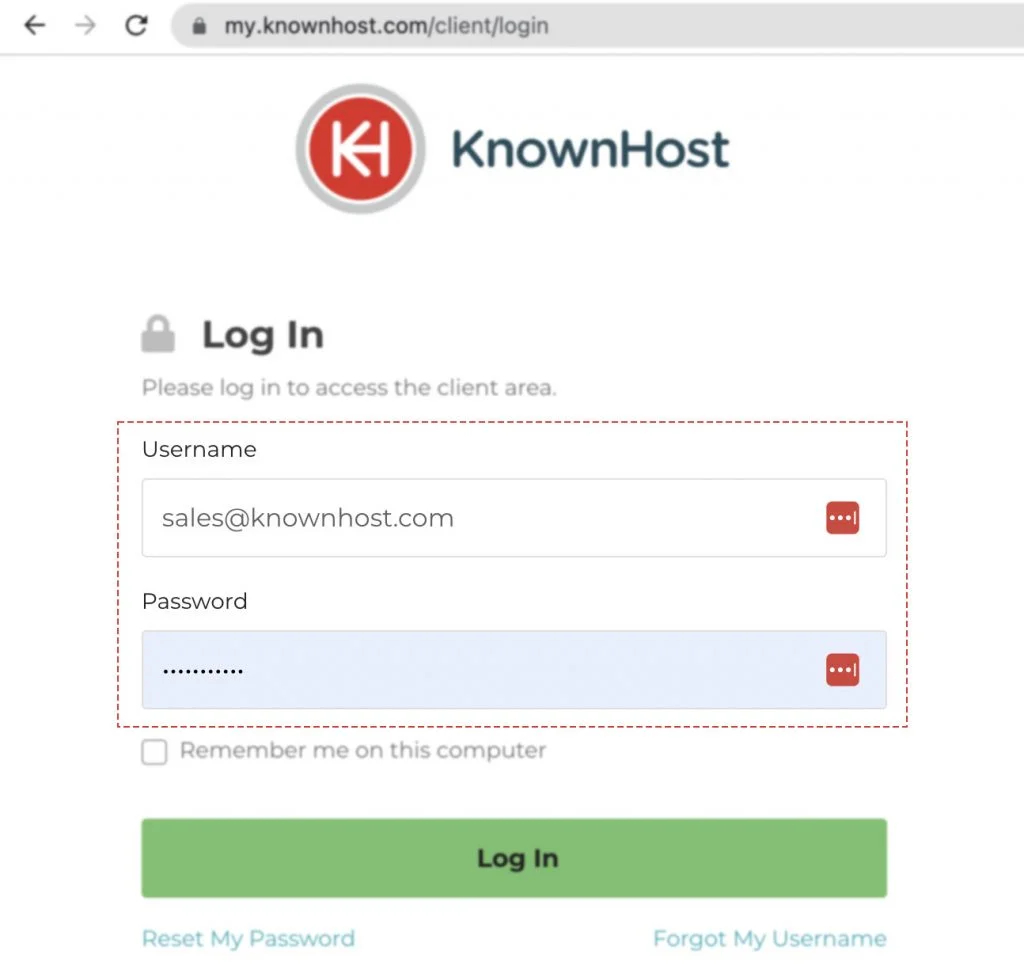
1. First, login into Billing Portal (my.knownhost.com) with your registered email address and password.
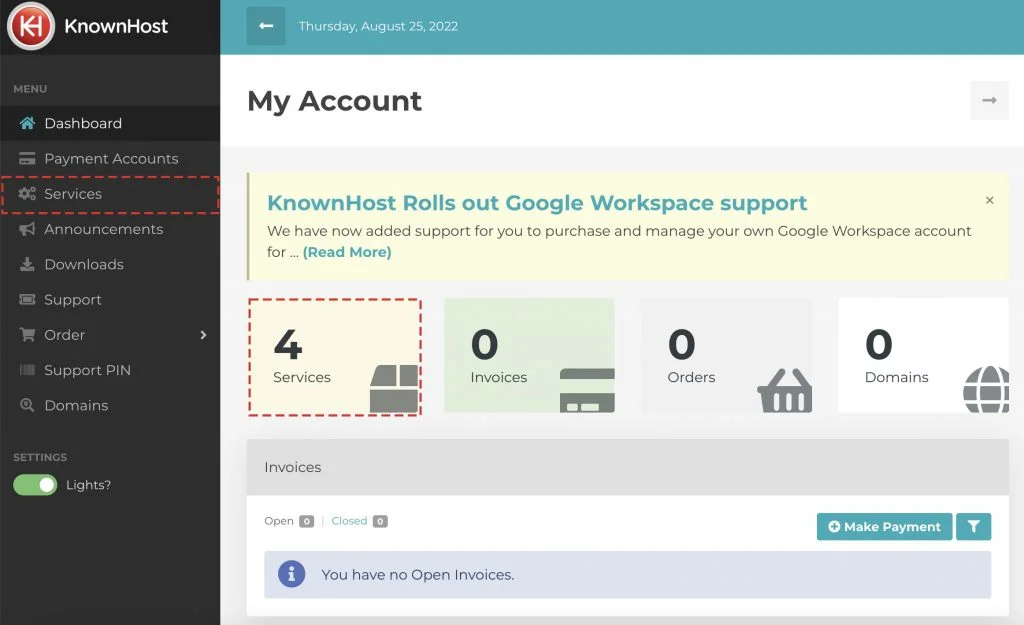
2. In the Navigation tray, you can find the option “Services” click on that or you can navigate to Dashboard → Click on Services.
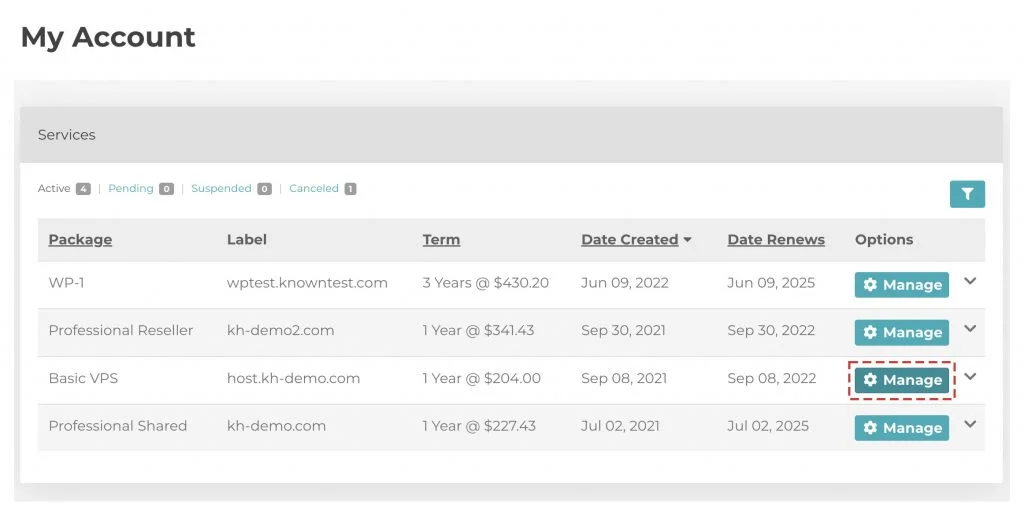
3. Now, click on the Manage option of any service you like to add/remove features.
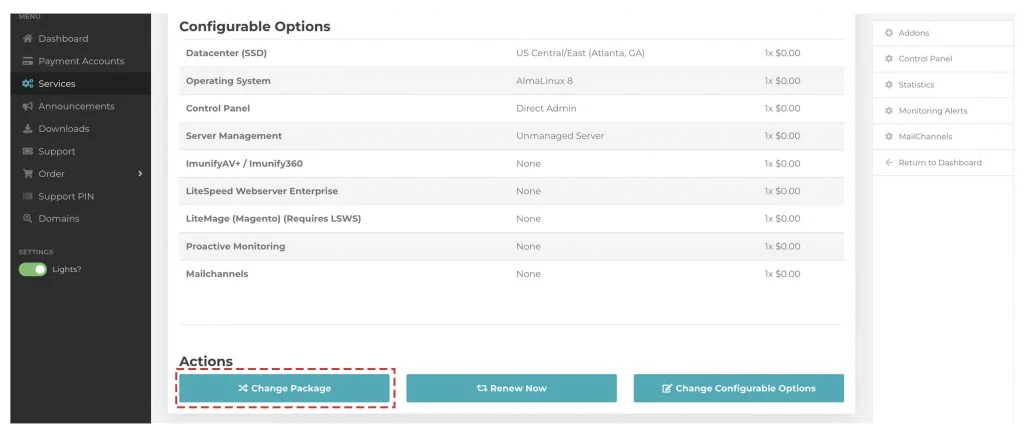
4. Scroll down, click on the Change Package.
5. Select the required new package and check the new package’s pricing details.
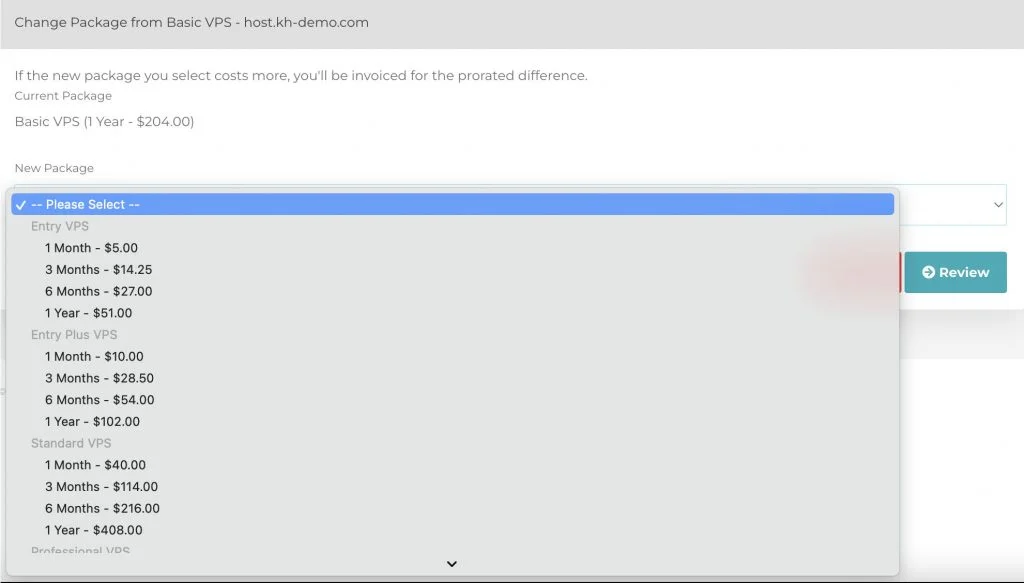
6. Next, click on Review.
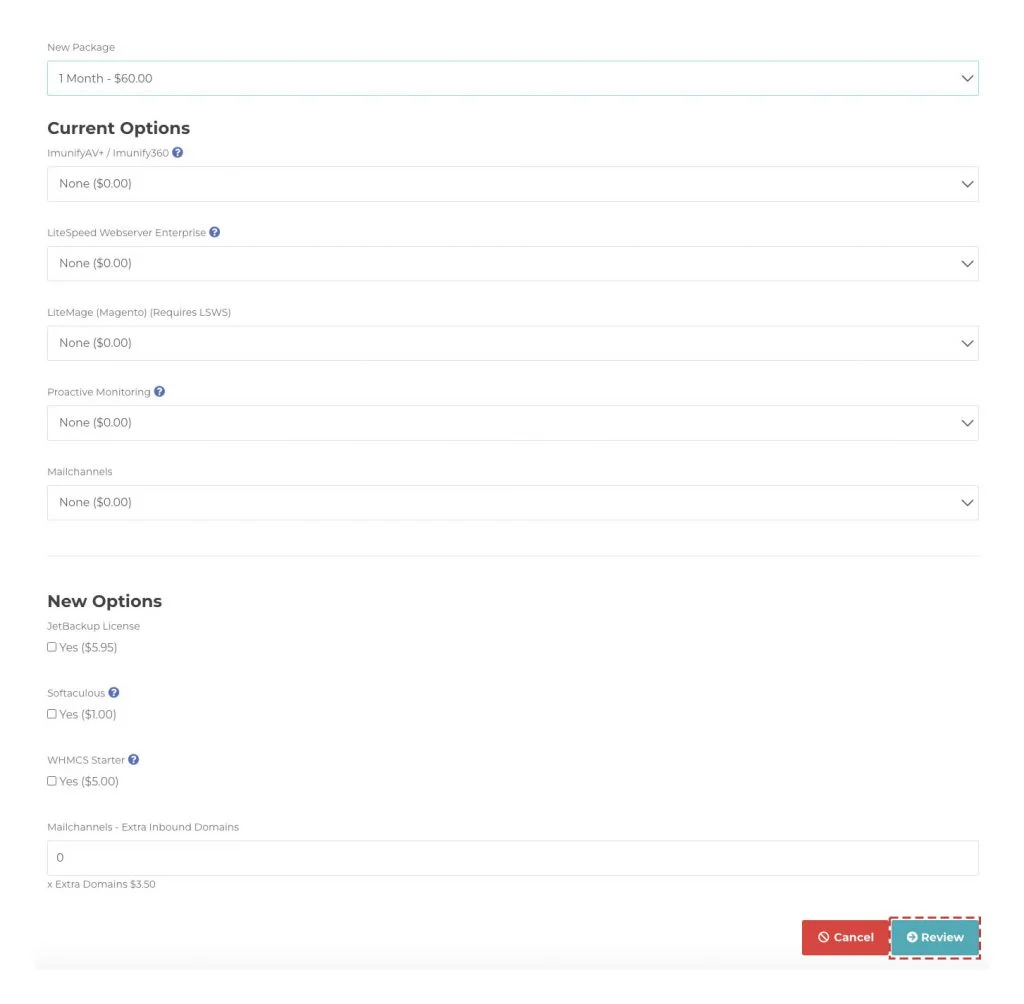
The system will calculate the present billing cycle and paid amount with the newly selected service. You will be notified of the same if you are required to pay any extra amount. Once you finish the checkout, you will receive a confirmation mail on your registered email address.
Conclusion
Flexible service comes with how much you can control your service. Suppose your requirements increases or decrease, and you can upgrade/downgrade the package accordingly through the above-shared steps here at KnwonHost.
KnownHost offers 365 days a year, 24 hours a day, all 7 days of the week best in class technical support. A dedicated team ready to help you with requests should you need our assistance. You’re not using KnownHost for the best webhosting experience? Well, why not? Check with our Sales team to see what can KnownHost do for you in improving your webhosting experience.