How To Install Blesta using Softaculous
If you are getting started as a hosting provider and need to set up your billing platform, then it doesn’t get any easier to install than this. Installing Blesta with Softaculous is so quick and easy, you’ll be shocked at how fast you’re up and running with Blesta!
First, we should check that the minimum requirements, and preferably the recommended requirements are met.
| Minimum Requirements |
|---|
| PHP version 5.4 |
| PDO, pdo_mysql, curl (version 7.10.5), and openssl (version 0.9.6) PHP extensions |
| MySQL version 5.0.17 |
| Apache, IIS, or LiteSpeed Web Server |
| ionCube PHP loader |
| Recommended Requirements |
|---|
| PHP version 5.6 or later |
| PDO, pdo_mysql, curl (version 7.10.5 or later), openssl (version 0.9.6 or later), gmp, imap, json, ldap, libxml, mailparse, iconv, mbstring, mcrypt, simplexml, and zlib PHP extensions |
| MySQL version 5.0.17 or later with max_allowed_packets = 128M or higher, and wait_timeout = 3600 |
| Apache, IIS, or LiteSpeed Web Server |
| ionCube PHP loader |
| memory_limit set to 64 MB or greater |
For Knownhost servers, you may need to install ionCube PHP Loader to meet the minimum requirements. To check whether it is installed, you can use the following command:
rpm -qa | grep -i ioncube | grep ea-phpThis will list any modules that are installed for EasyApache 4. If none are listed, then you will need to install the ionCube PHP Loader module. This can be done via SSH as the root user using the following command (you will need to replace ## with the 2 digits for the php version you are using, such as 54, 55, 56, 70, 71, etc):
yum -y install ea-php##-php-ioncube10If you have multiple PHP versions installed, you can check in WHM’s MultiPHP Manager to determine what PHP version the site is assigned to. If it says Inherit, then the site is using the system’s default PHP version, which is noted near the top of the page. If it is not using the inherit PHP version, then it will explicitly say what version of PHP the site is set to use.
Let’s install Blesta.
- Log in to cPanel. If your domain is mydomain.tld, you will use the following URL:
https://mydomain.tld/cpanel
- Locate Softaculous within your panel’s interface. You can search for it in the top corner if necessary.

Click Softaculous.
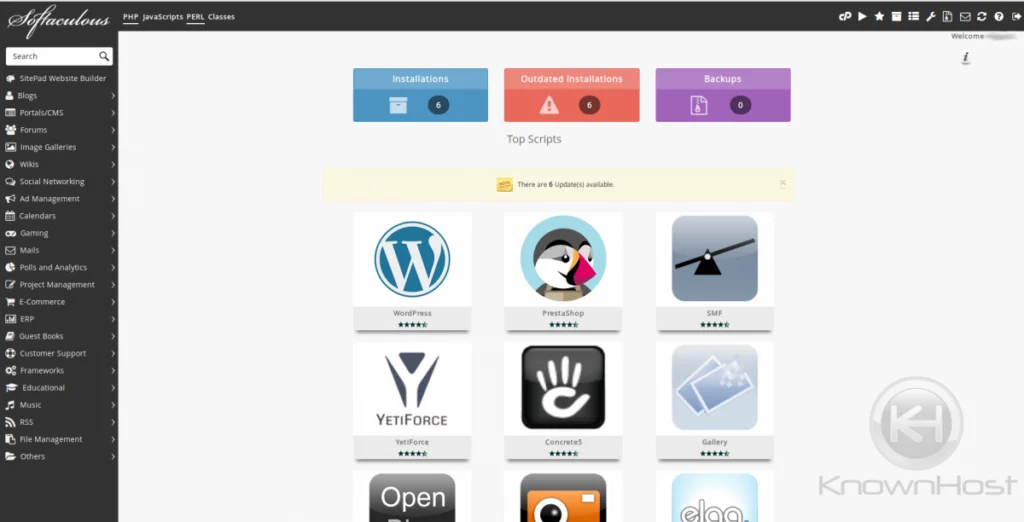
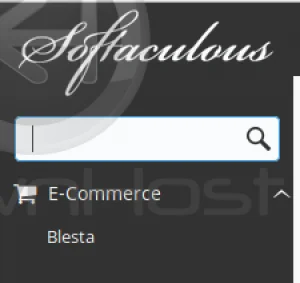
Search box » Type Blesta. Press Enter OR Locate the Navigation pane on the left side » Click E-Commerce, then click Blesta.
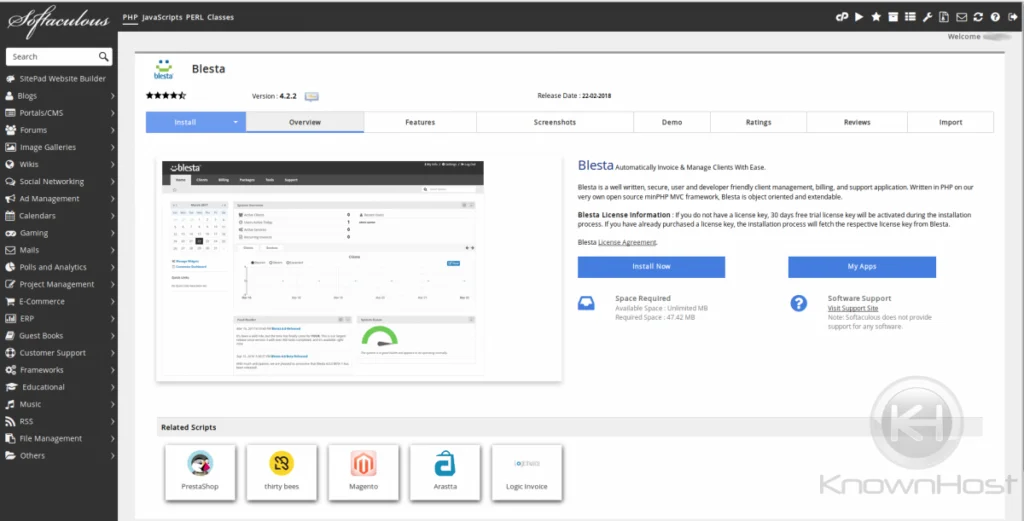
Click Install
You should now see the following interface:
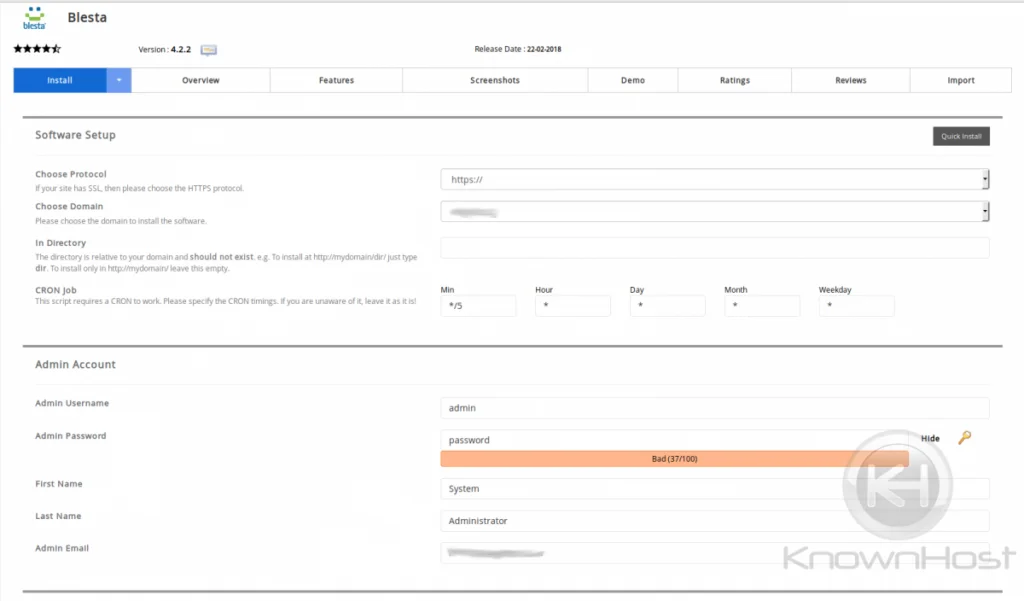
- Choose Protocol list box » Select https:// or select https://www. if the install should use the www subdomain. Confirm that you are using a valid SSL for the domain if you choose https. Also, check that the WWW A record exists if you’d like to use www.
- Choose Domain list box » Select the domain for installation.
- Directory text box » Type the directory where you want to install the application. Leave this blank, or with only ‘/’ if some input is required, if you want the domain’s landing page to load the Blesta installation. Otherwise, choose the subdirectory you want to load the installation, e.g. https://www.domain.tld/blesta .
- CRON Job text boxes » Type the cron job intervals you’d like to use. If you are unsure of the values you should use, accept the default values.
- Admin Username text box » Type the administrator username you’d like to use.
- Admin Password text box » Type the administrator password you’d like to use. I recommend letting Softaculous generate one for you so to ensure that your password is strong and randomly generated.
- Admin Email text box » Type the site administrator e-mail address you’d like to use with this installation.
- Click the Advanced Options icon.
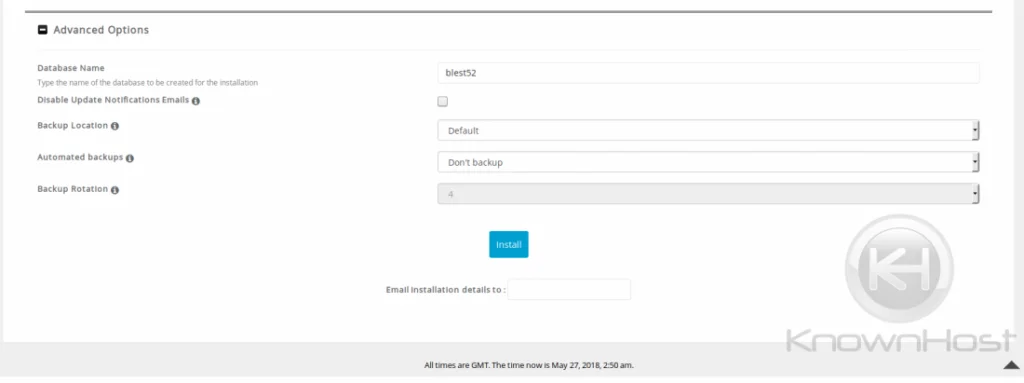
- Select the Disable Update Notifications check box if you do not want to receive notifications when updates are available. I recommend leaving this option enabled.
- Type an e-mail address in the Email installation details text box to receive installation details.
- Click Install after confirming all details entered are correct.
- You should receive an email with the installation details shortly.
Next, you should consider setting up Two Factor Authentication, configuring a backup schedule either via cPanel (preferred) or via Blesta itself , and install and necessary modules, such as for cPanel or DirectAdmin.
That’s it! Enjoy your Blesta installation!