How to Use the Cron Daemon for wp-cron
This article describes how to replace WordPress’s internal cron mechanism with a cron job run by the operating system’s cron daemon.
What is wp-cron and How Does it Affect Your WordPress Site
File wp-cron.php resides in the root directory of the WordPress site and is checked each time someone visits your site. If there is a task and its scheduled runtime has passed at the time of the visit, WordPress runs that task.
This is how it looks in Apache logs:
"POST /wp-cron.php?doing_wp_cron=1517537460.9037239551544189453125Therefore, the more visits the website gets the more frequently wp-cron.php has to be checked. This may cause a significant burden in terms of processing power on sites with high traffic.
There are two stages to the process: disabling WordPress’s cron mechanism, and setting the task as a cronjob.
Disabling via cPanel
Using cPanel, disabling the wp-cron can be done via the File Manager, and setting up the cronjob can be done in the “Cron Jobs” section of cPanel.
Disabling wp-cron via File Manager
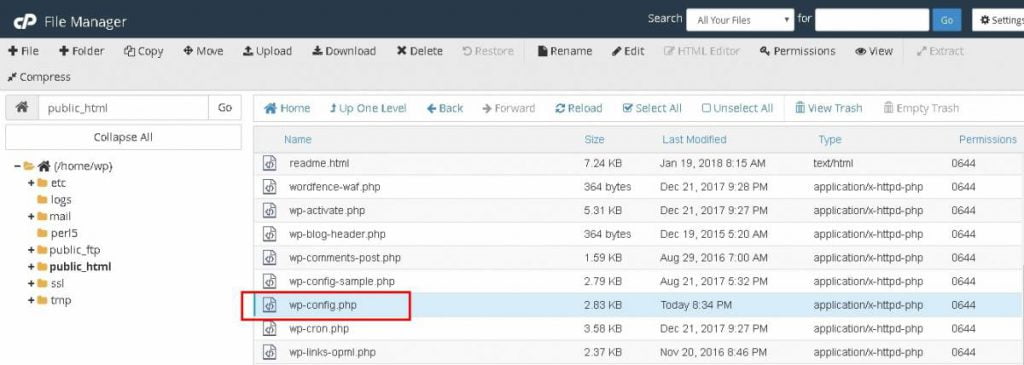
Go to cPanel and click on “File Manager”. Find the file wp-config.php which also resides in the site’s root directory, and click on “Edit” in the top menu:

Add the following line in the file:
define('DISABLE_WP_CRON', true);You may add this in any place between existing define directives, for example at the very top just after <?php symbols:

Click “Save Changes” and then “Close”.
Now WordPress will not run the wp-cron.php script every time someone visits your site. However, there is still a need for the cron jobs to run periodically.
Setting Up Cron Jobs in cPanel
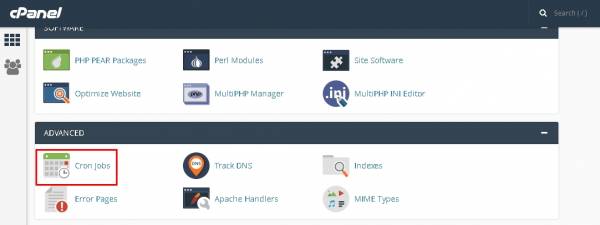
Open cPanel and click on the Cron Jobs icon in the Advanced section:

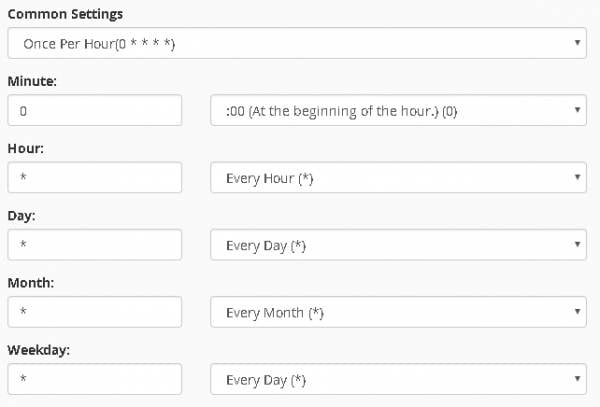
You may choose a predefined running interval in the Common Settings section. For example, to run once per hour:

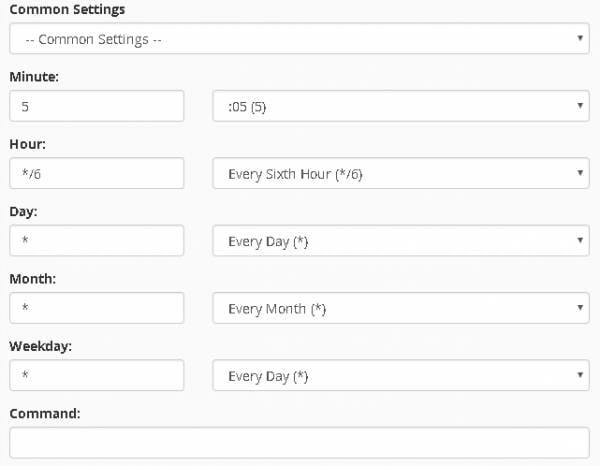
Alternatively, you may combine predefined settings for each particular time/date section. For example, to run every 6 hours at 5 minutes after the hour:

And finally, you need to set up the command to run. Please note that you need to run the script with the specific PHP settings used by your site, e.g., the correct PHP version. That means that you need to invoke the php command from inside the root directory. For example, if the site’s root directory is /home/wp/public_html, the command would be:
cd /home/wp/public_html; php -q wp-cron.php
Click the “Add New Cron Job” button. You should see the added cron job below:

Disabling wp-cron and Setting Up System Cron Job via SSH
Go to the site’s root directory, for example /home/wp/public_html/:
cd /home/wp/public_html/Open file wp-config.php in a text editor, for example vi:
vi wp-config.phpAdd the following line just after the <?php line on the top:
define('DISABLE_WP_CRON', true);Save and exit the text editor.
Open the crontab editor. If you are logged in as the cPanel user then run:
crontab -eIf you are logged in as root and you need to edit the crontab for a cPanel user then run:
crontab -e -u USERNAMEAdd the following line, save, and exit the text editor:
5 */6 * * * cd /home/USERNAME/public_html; php -q wp-cron.phpTo check the crontab run:
crontab -e -l USERNAMEYou can find more information on crontab syntax here.
Conclusion
Have a WordPress website? Check out our Managed Hosting for WordPress and see if we are a good fit for you. KnownHost offers 365 days a year, 24 hours a day, all 7 days of the week best in class technical support. A dedicated team ready to help you should you need our assistance. You’re not using KnownHost for the best webhosting experience? Well, why not?