How to Manage VPS Settings
Within this article, we’ll be going over the different functionalities of the “Settings” area of your virtual server management portal.
We will cover the following sections
- Changing the Hostname
- Changing the root password
- Adding SSH Keys
- Accessing VNC Console
- Accessing Serial Console
Changing the Hostname
All servers have a FQDN(Fully Qualified Domain Name) that is set during provisioning. This is required as a proper label and identifying measure of that hostname when rDNS is configured.
In some situations though, the initial hostname you provided when the server was provisioned may not be suitable any longer and you’ll wish to change it.
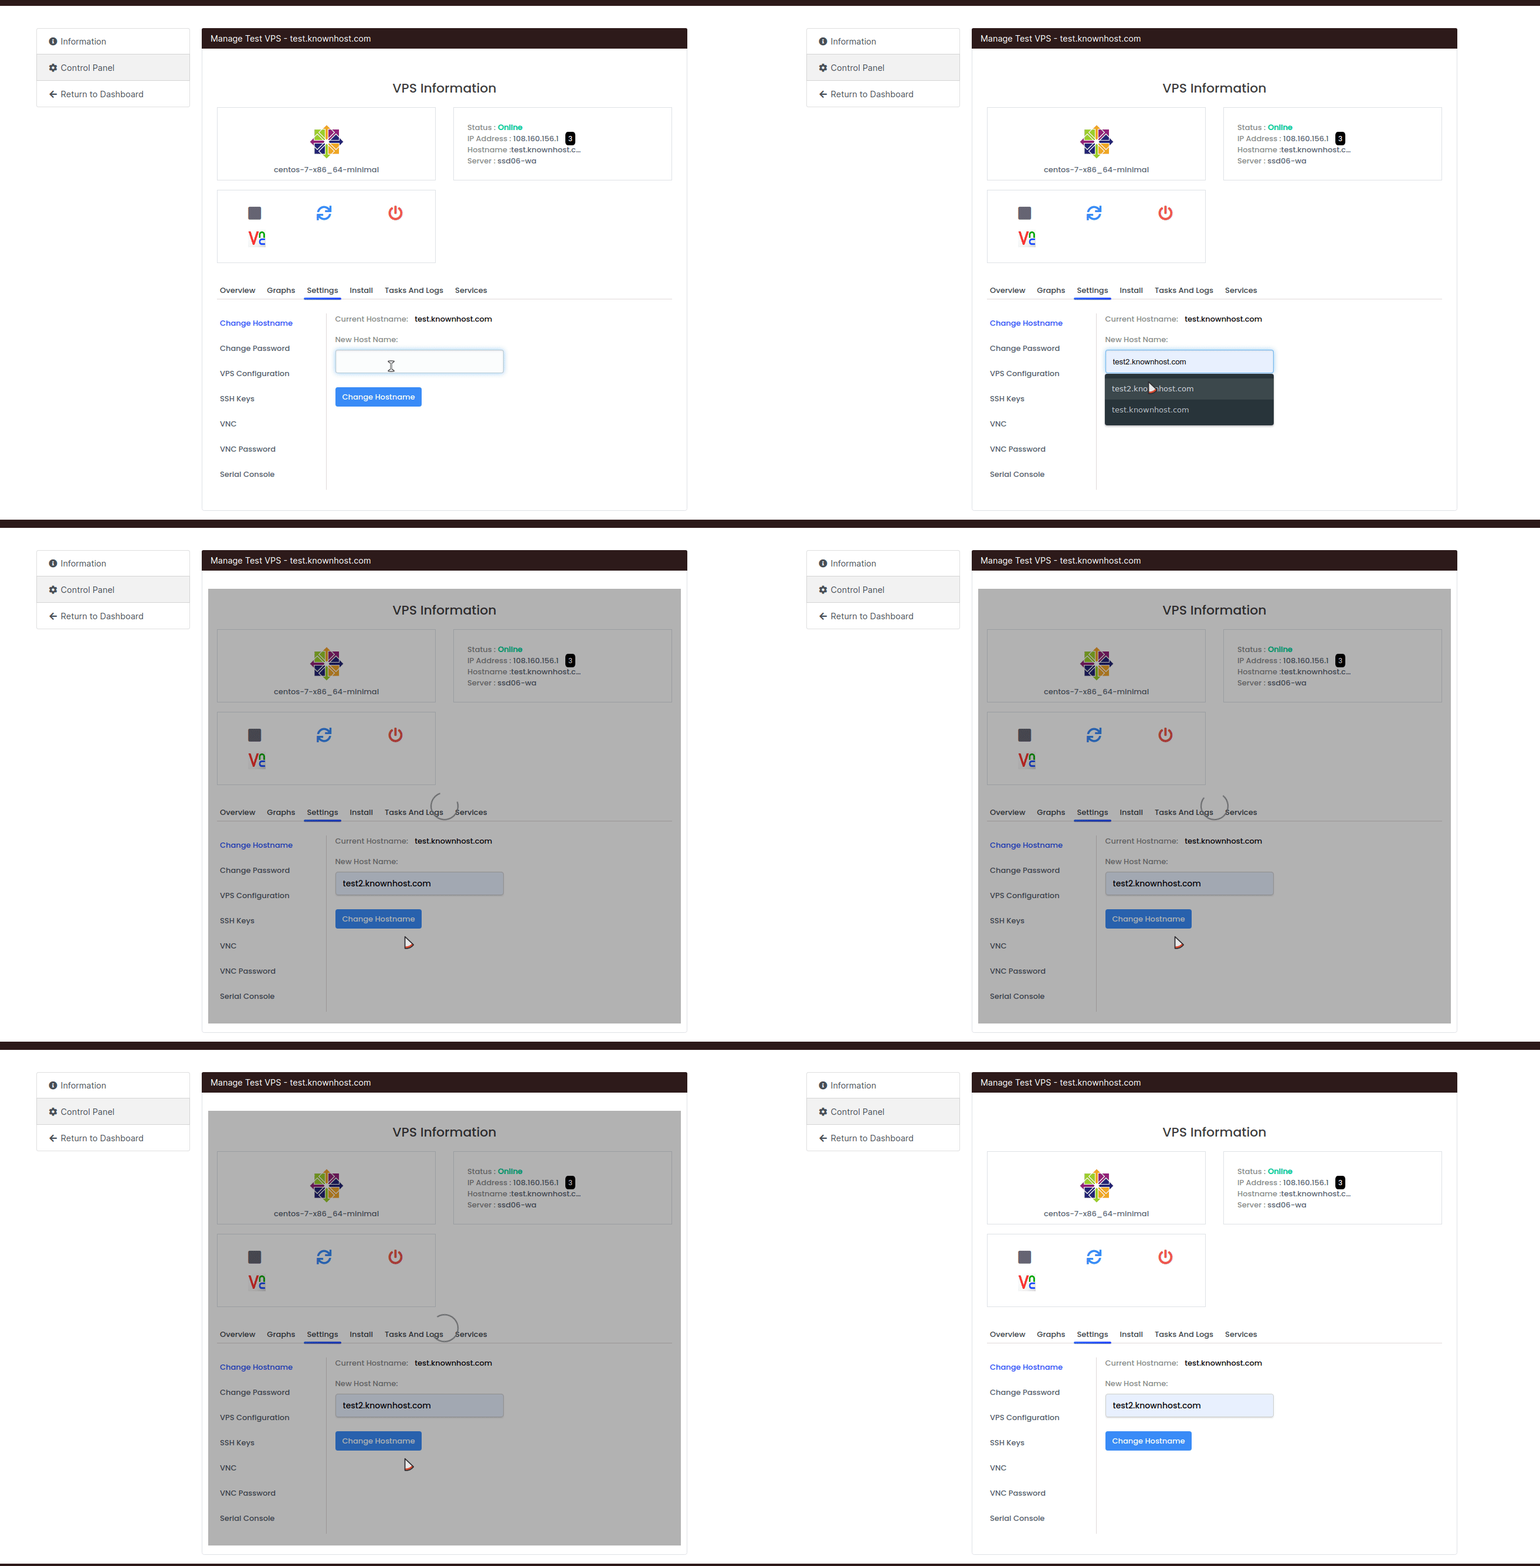
To do so, simply navigate to the “Settings” group and use the “Change Hostname” feature as shown in the following animated image.

Once it’s confirmed change, you can refresh the portal to show the hostname change and/or verify from within your server using the command ‘hostname’.
[root@test2 ~]# hostname
test2.knownhost.com
Changing Root Password
The virtual servers provisioned by KnownHost all have ‘root’ users. These root users have automatically generated passwords upon provisioning that get sent to you when you have the server provisioned. Should you forget this password, delete that email or change the password and later forget it, you can reset the password within the virtual server management portal.
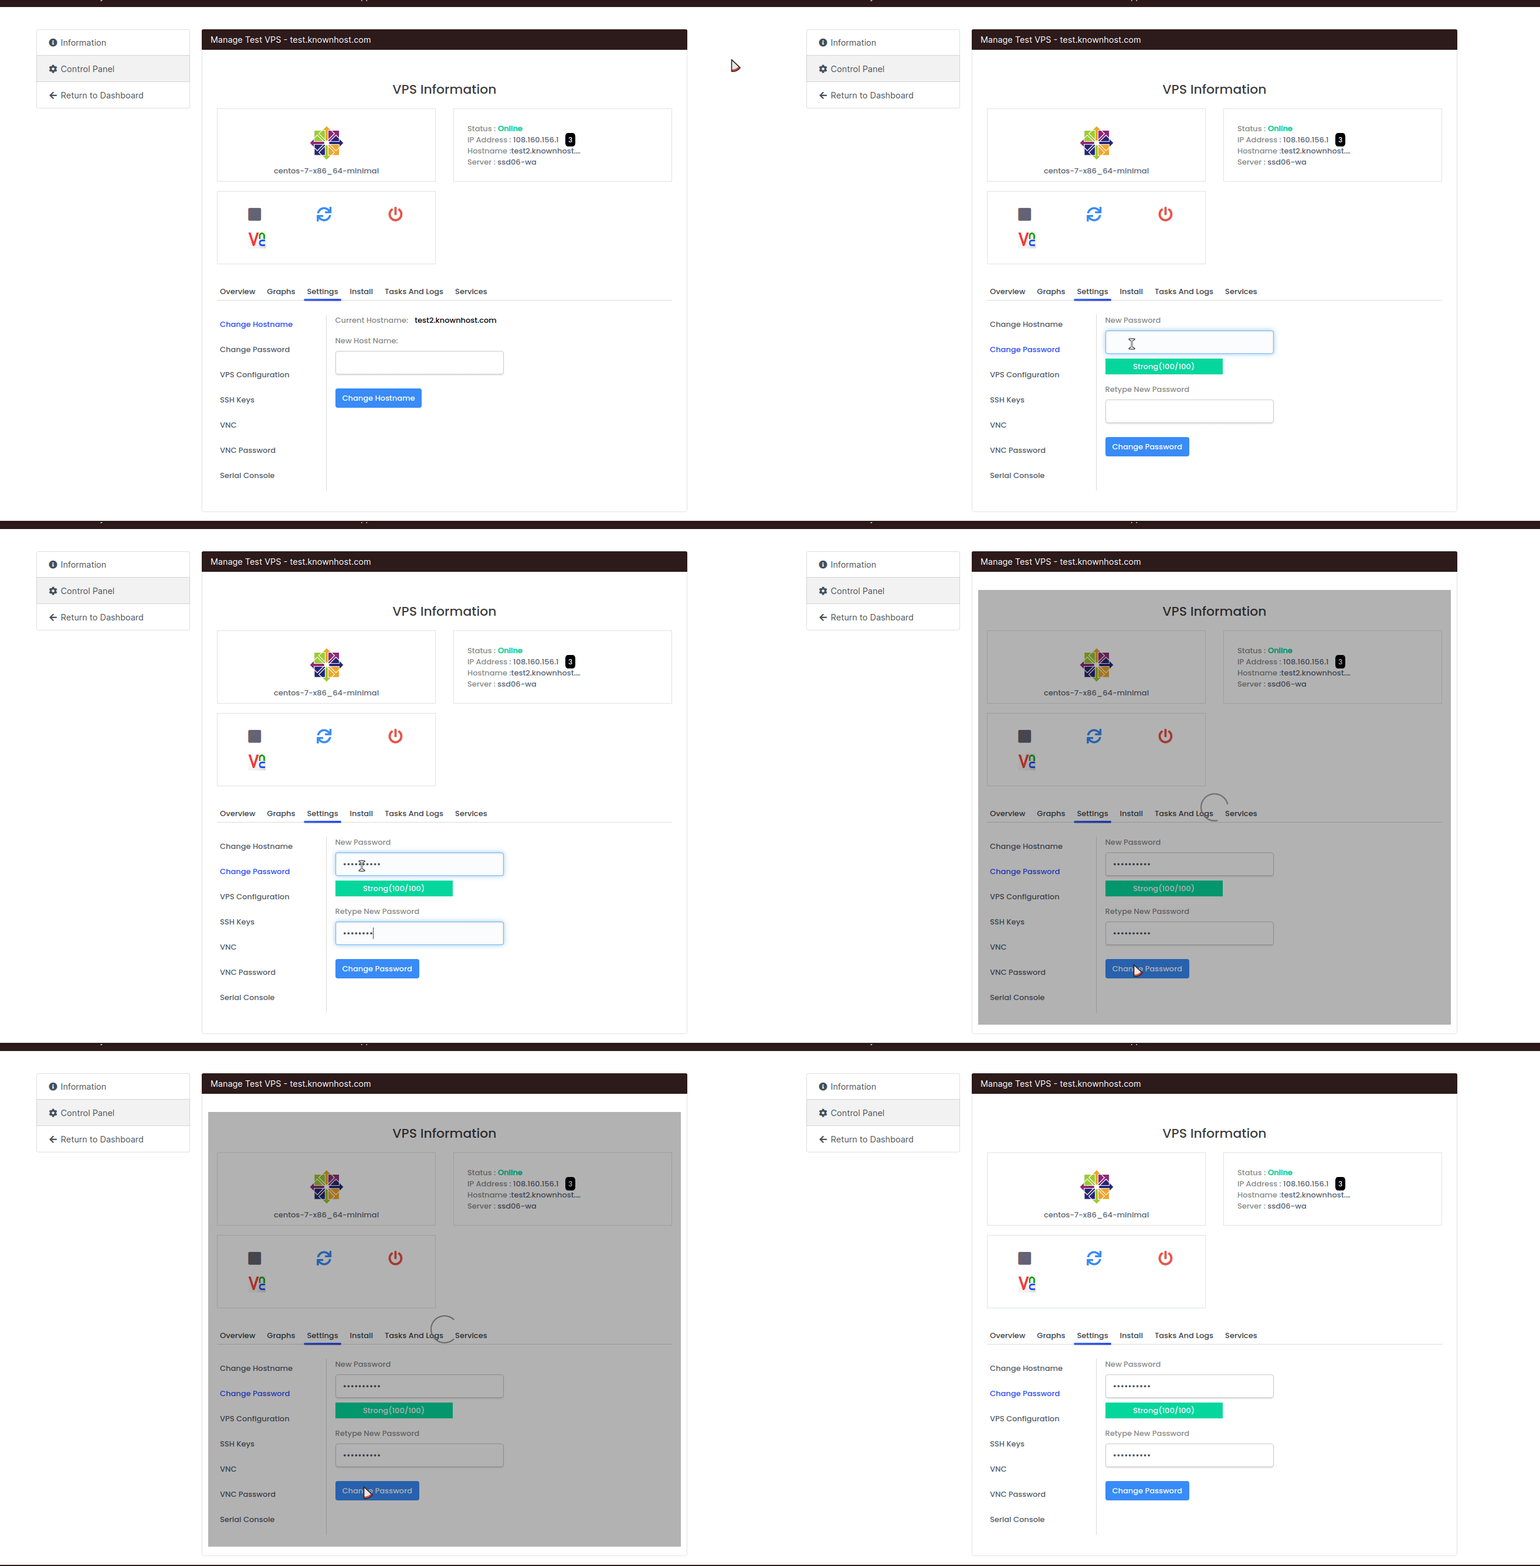
We can do so by using the “Change Password” function as shown in the following animated image.

a-z, A-Z, 0-9 and !@#$%^&*()
Adding SSH Keys
One of the most common security tips for Linux servers is to disable password authentication for root and use SSH Keys. SSH Keys allow you to login as that specified user without the need for a password. This functionality helps you add and manage SSH Keys for the ‘root’ user on your server.
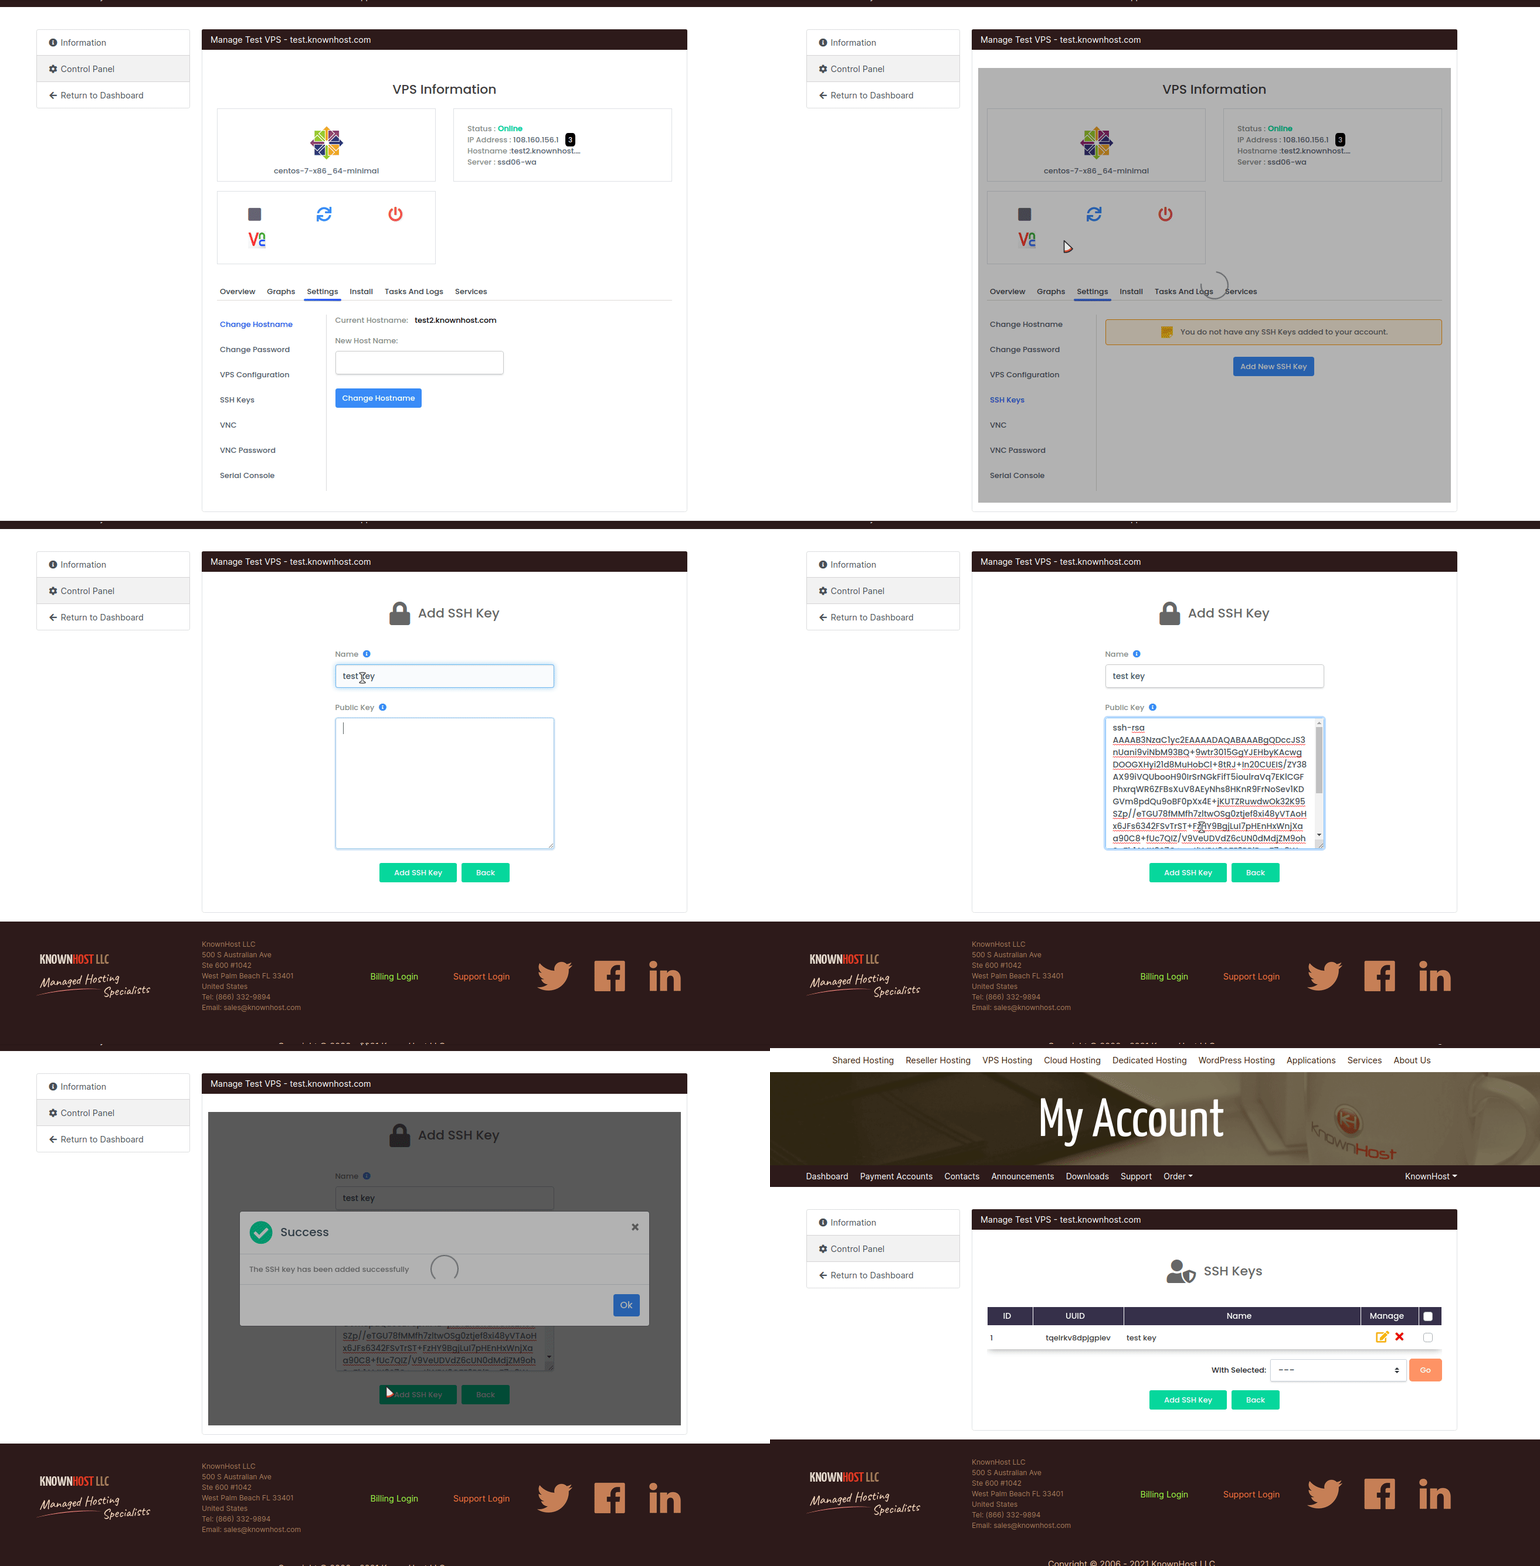
This will be the information from the public key, i.e ‘/home/example/.ssh/id_rsa.pub’
If you need to create an SSH Key, check out our SSH Key Generation guide.
To see how we add an SSH Key, check our animated image below

Once the key has been added, you can then login to the server without requiring the root password.
Accessing Serial Console
Should you need to be able to get into the server, but the VNC section isn’t working or you want an actual shell from your own terminal, you can setup a serial connection that can be accessed from your preferred terminal.
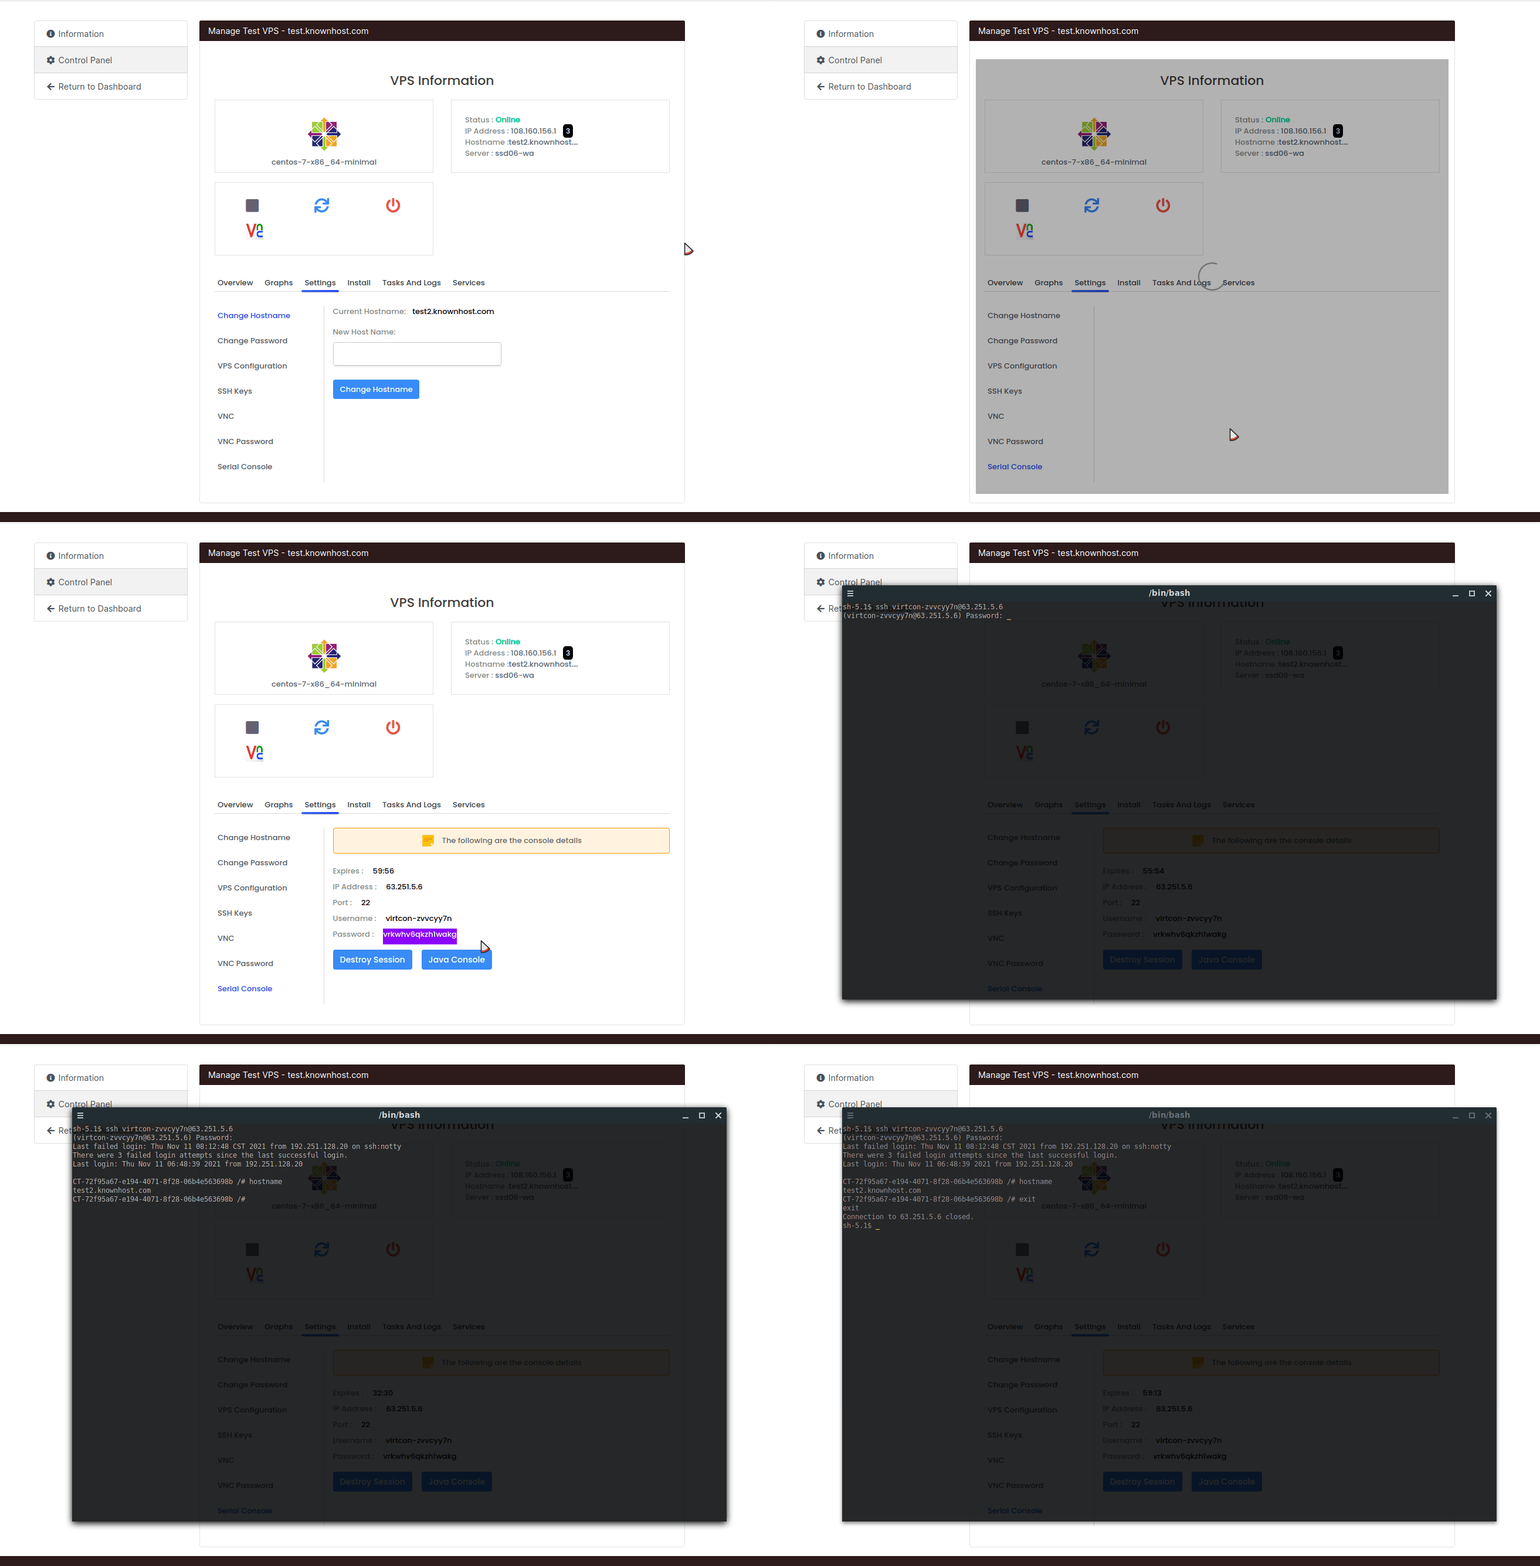
To do this, we navigated to the “Serial Console” section and clicked “Create Session”. This session provides us with information regarding how we can connect.
- Time before session expires
- IP Address to use
- Port
- Username
- Password
As you can see in our animated image, we then take this information to our preferred terminal to connect to the console. We then execute ‘hostname’ to show that we’re within the specified container.
You can also see how we highlighted the password to copy and paste into our shell, which may or may not work depending on the terminal you use.
