How to enable WordPress debugging
Suddenly your website isn’t working after that plugin install? Need to figure out why the website is failing to load? This can be done with WordPress debugging mode.
There are certain situations with WordPress where you may be experiencing issues with customized code, themes and/or plugins that have been recently added to your website.
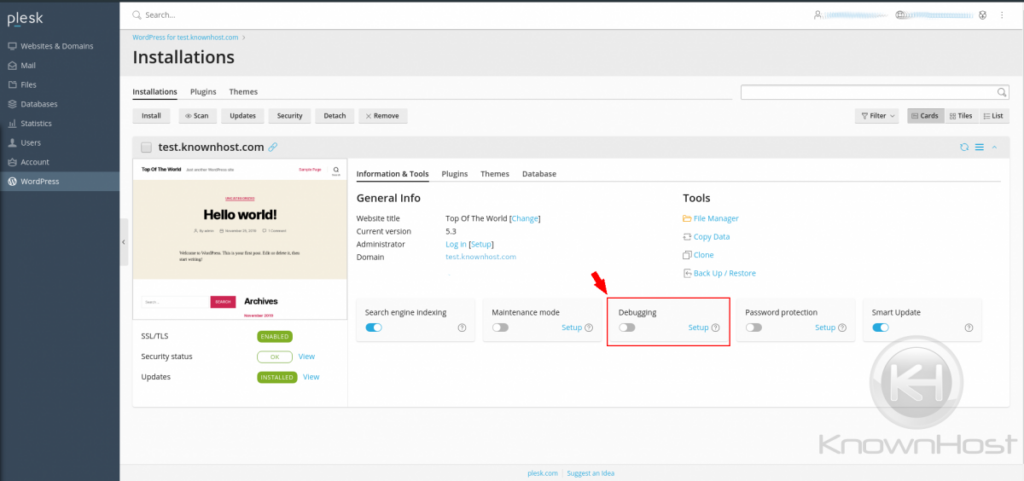
Enabling this feature on WordPress is easy with the WordPress interface within Plesk.
To enable it – simply click the toggle switch where ‘Debugging’ is.

Configuring WordPress Debugging
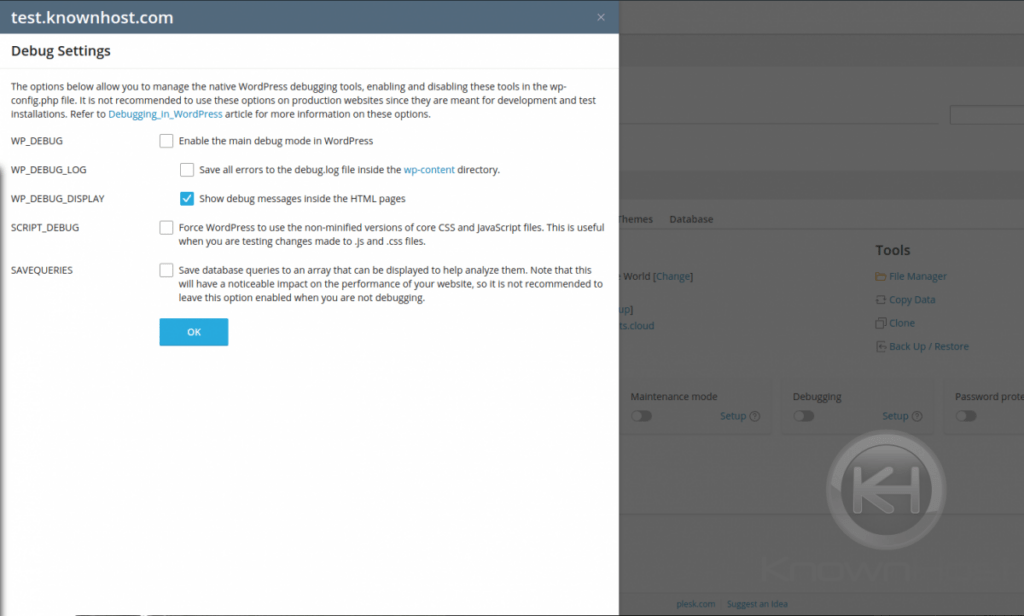
The WordPress toolset allows for specific configuring of the debugging settings. These configurations enhance the amount of debugging information provided for advanced troubleshooting.
- WP_DEBUG_LOG
- WP_DEBUG_DISPLAY
- SCRIPT_DEBUG
- SAVEQUERIES
These options are shown after clicking the “Setup” link near the “Debugging” toggle.
You’ll be provided with a window that explains the debugging capabilities in great detail.

With this easy-to-use interface, enabling debugging for troubleshooting has never been easier.
Conclusion
Now that we’ve gone over how to enable debugging on WordPress using Plesk. You can always contact KnownHost support if you need any more help.
Have a WordPress website? Check out our Managed WordPress Hosting and see if we are a good fit for you. KnownHost offers 365 days a year, 24 hours a day, all 7 days of the week best in class technical support. A dedicated team ready to help you should you need our assistance. You’re not using KnownHost for the best webhosting experience? Well, why not?