How to add ACH payments
ACH or Automated Clearing House is one of the available payment methods here at KnownHost. This method utilizes banking details to schedule automated payments with ease. Adding ACH payments to your account is very easy to do. You’ll be granted the ability to issue direct payments from your own account details once it’s been added.
Adding your ACH Account
You’ll need to login to your My KnownHost account. Once logged in, you’ll be presented with your customer dashboard.
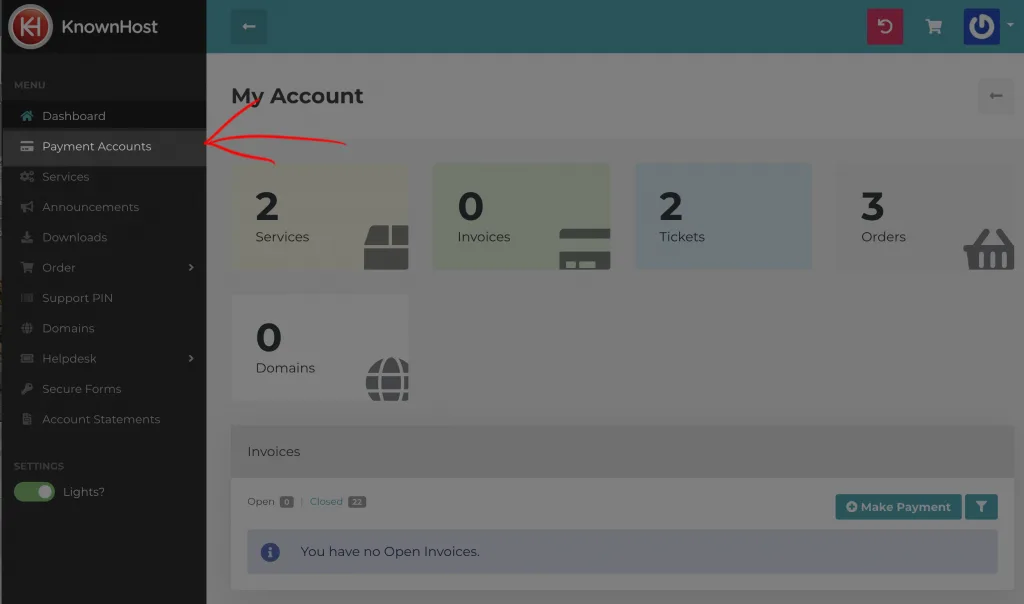
Step 1: Click “Payment Accounts” at the top of the navigation bar as highlighted below:
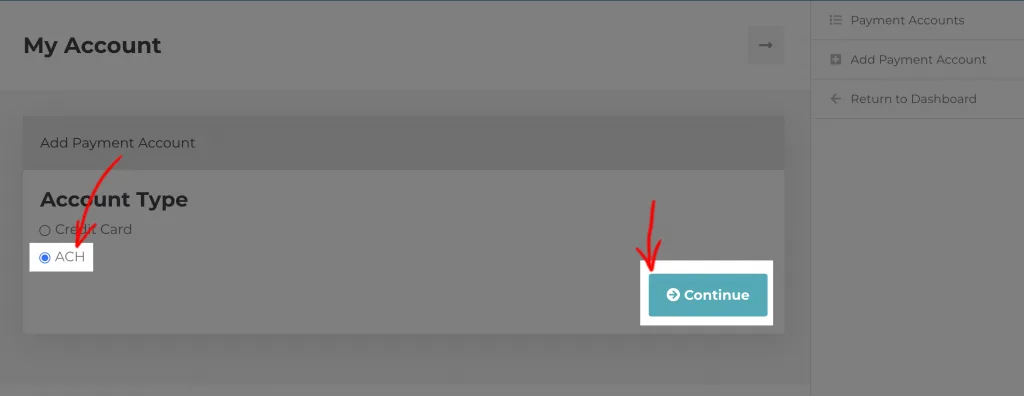
Step 2: Choose ‘ACH’ as highlighted and then continue.
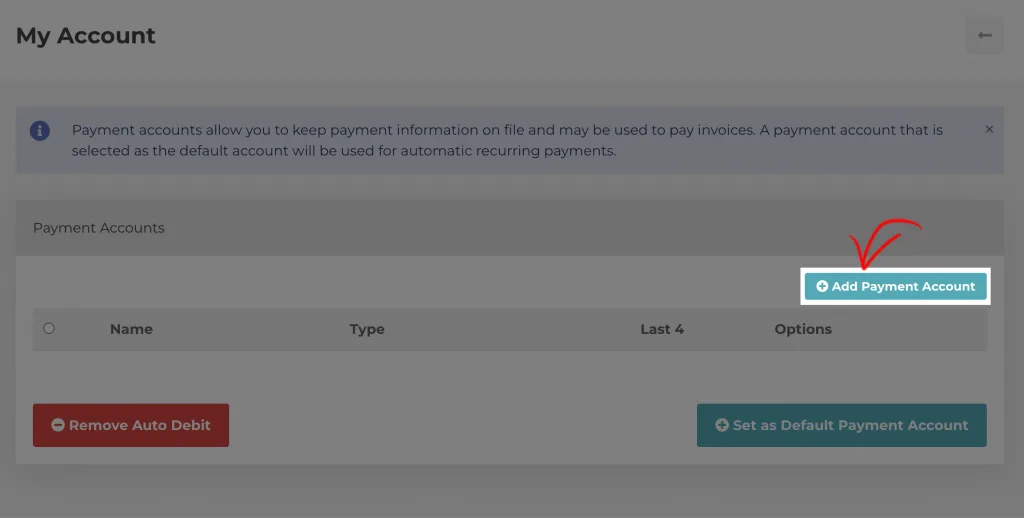
Step 3: Enter your billing information from the dropdown and enter your account information
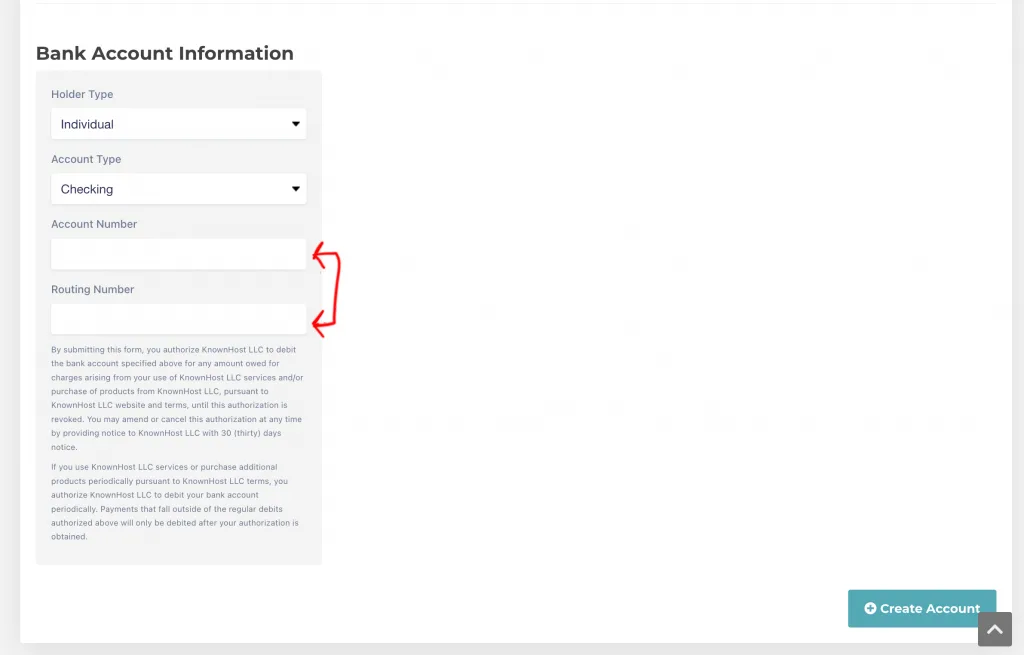
We allow for the following holder types:
- Individual
- Company
We allow for the following account types:
- Checking
- Savings
Once you’ve created, that’s it. Your ACH is now linked and you’ll need to verify.
Verifying your ACH Account
In order to use the newly added ACH account, you’ll need to verify the account. This is done in the form of microdeposits made to the account added.
You can do this by going to the ACH account and clicking the ‘Edit’ button:
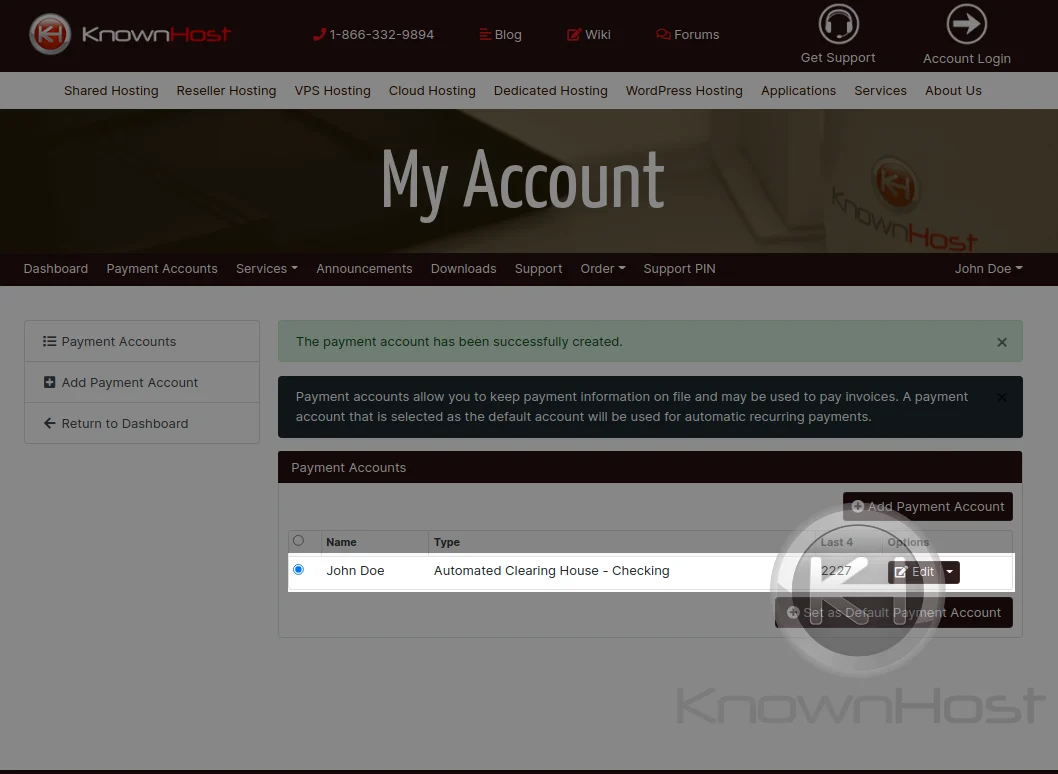
When you click edit, you’ll be provided with the screen where you can verify the microdeposits that were made to your account.
Verification can be completed by checking the accounting statement for the microdeposit amounts of ‘$0.XX’. There should be two deposits, you’ll enter both amounts in the provided fields.

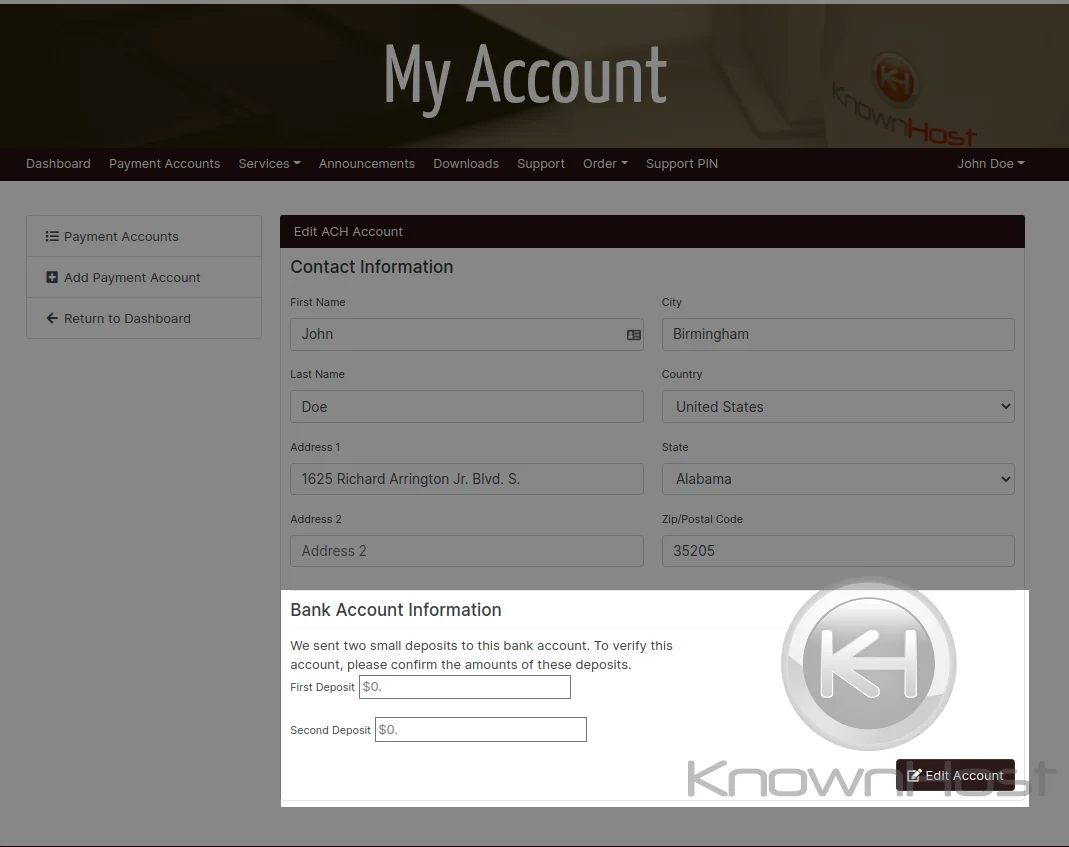
When you’ve confirmed the amounts deposited, this will complete the verification process and enabling your ACH account for current and future transactions.
Conclusion
Should you experience any issues and/or have questions regarding this process, feel free to reach out to our Billing Department through our ticketing system or emailing them direct. Our Billing Department operates 7am-7pm CST.