How to enable Two-Factor Authentication (2FA) for KnownHost?
You can enable and configure the Two-Factor Authentication on KnownHost’s Billing portal, just the same way we earlier saw for the cPanel control panel. There are many authentication apps that you can use to set up the 2FA, but for this article, we are using an authentication application.
For Android: play.google.com/store/apps/details?id=com.google.android.apps.authenticator2&hl=en
For IOS: itunes.apple.com/us/app/google-authenticator/id388497605?mt=8
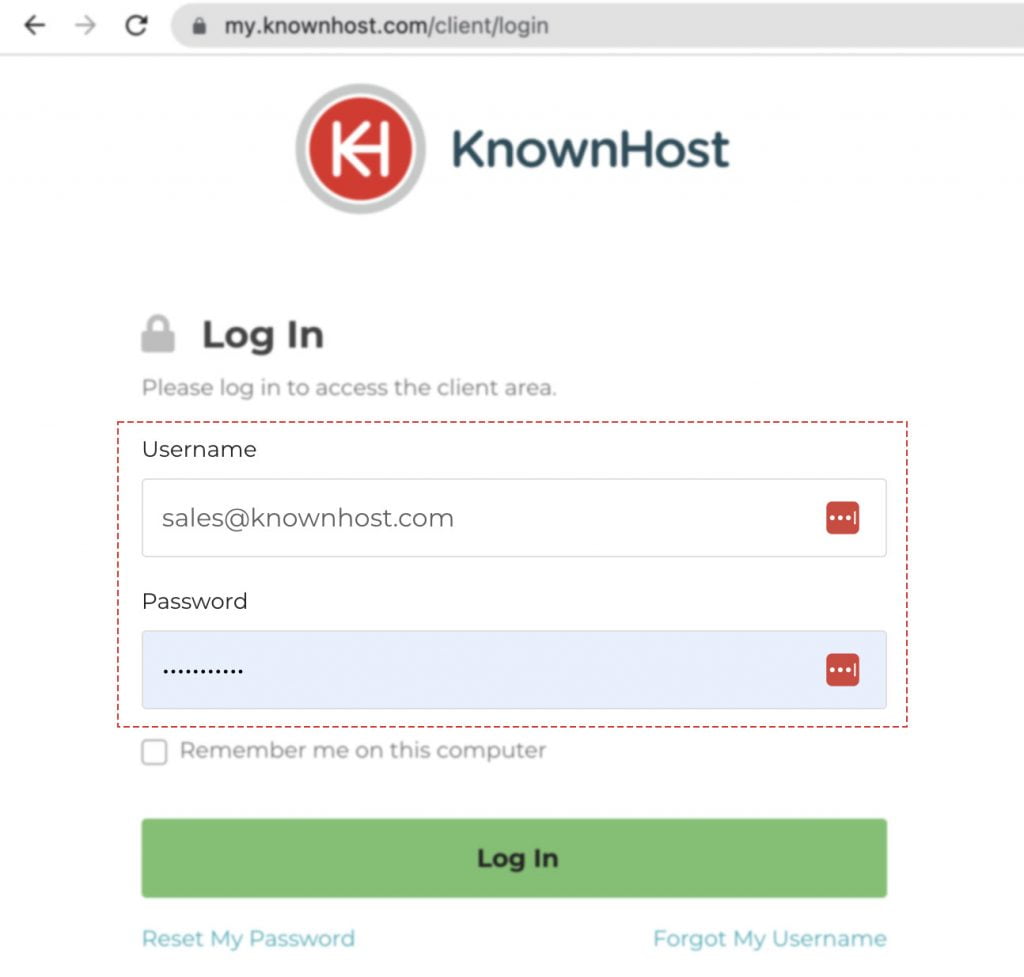
1. First, login into Billing Portal (my.knownhost.com) with your registered email address and password.
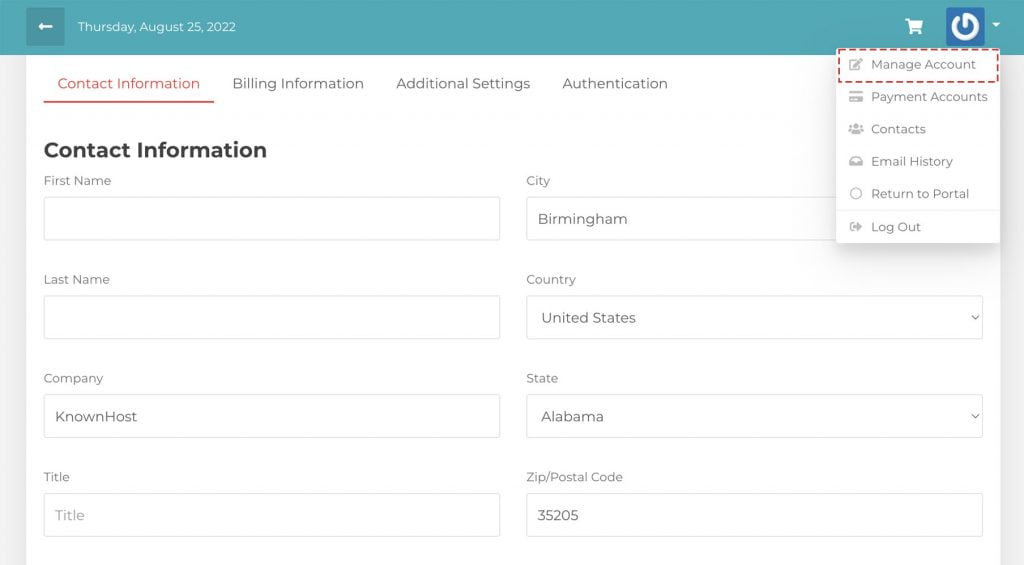
2. Navigate to Manage Account (my.knownhost.com/client/main/edit/).
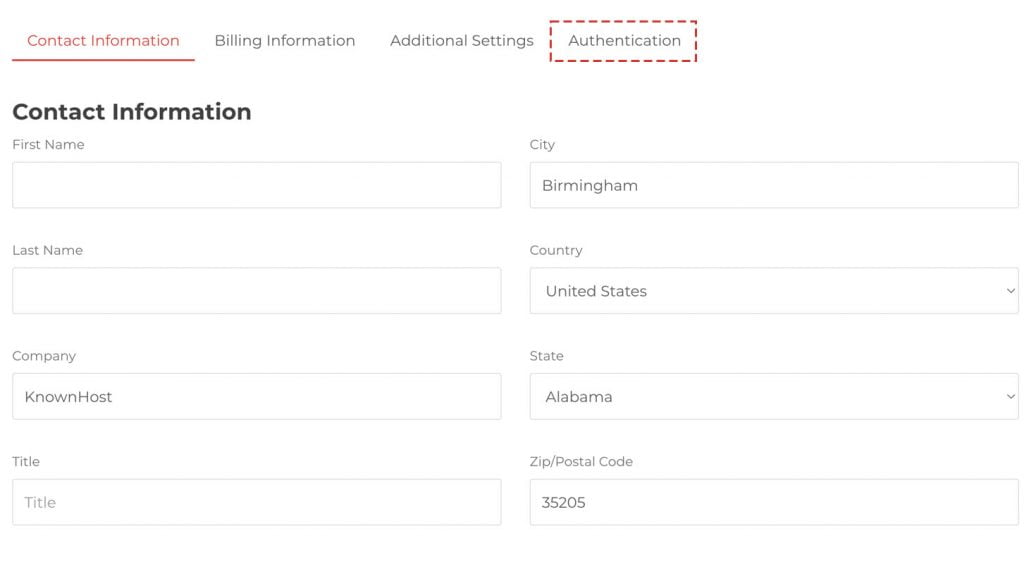
3. Navigate to Authentication.
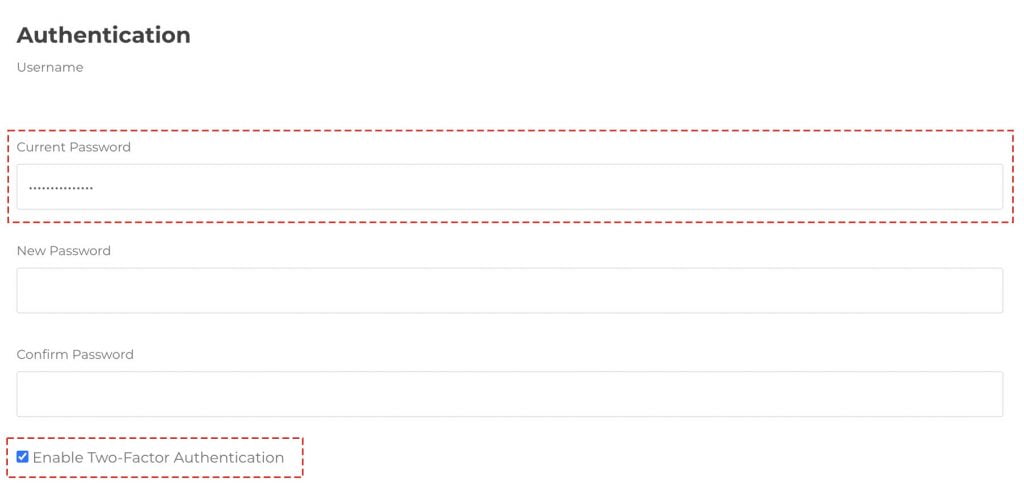
3. Next, check the option “Enable Two-Factor Authentication” and Enter the Current Password.
4. Here you have step- by-step instructions on how you can setup 2FA with the QR code.
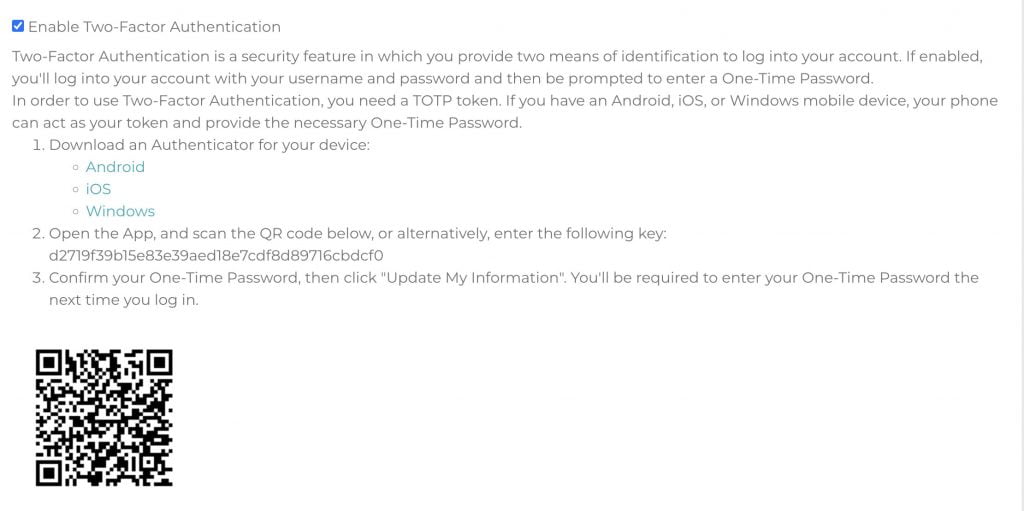
5. Now, scan the 2FA QR code with the authentication application.
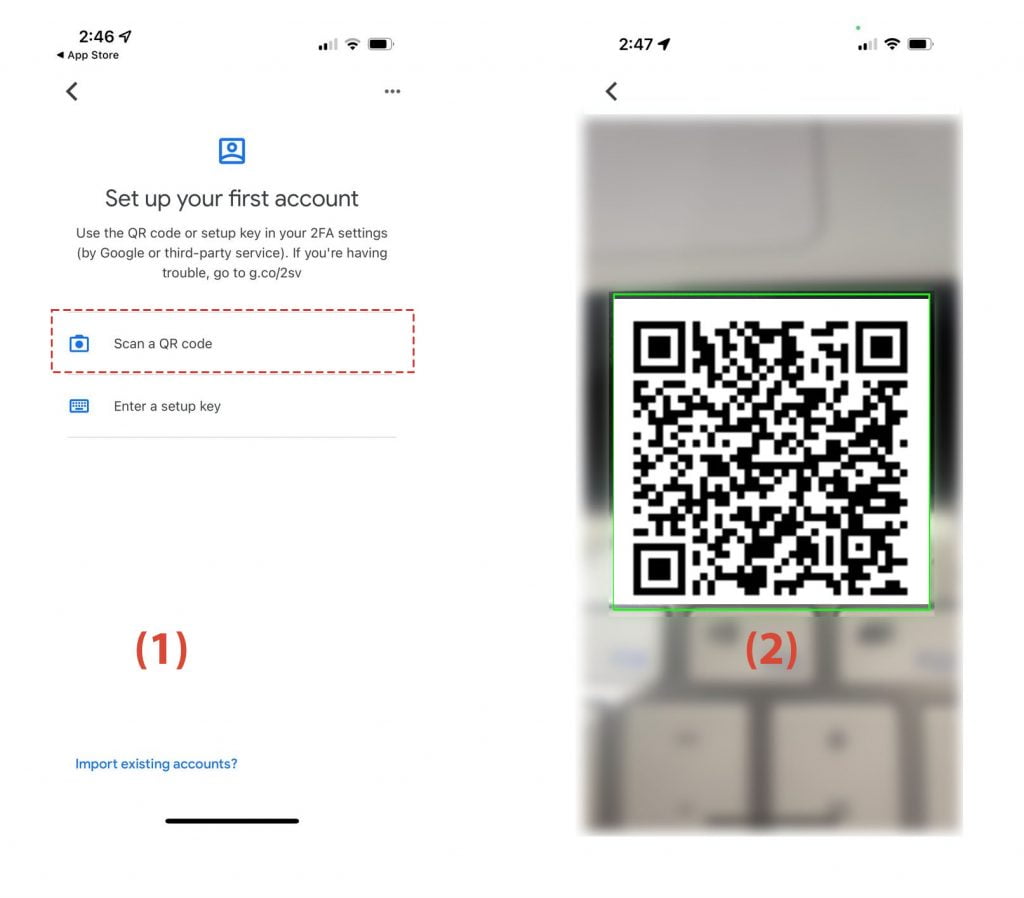
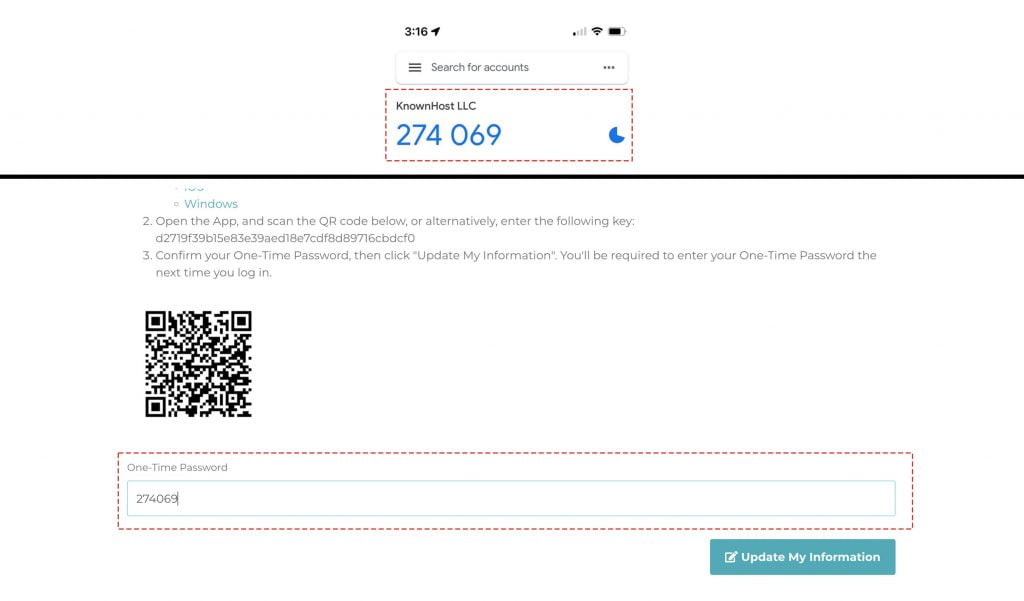
6. Then, enter the 6-digit OTP.
7. Finally, click on Update My Information.
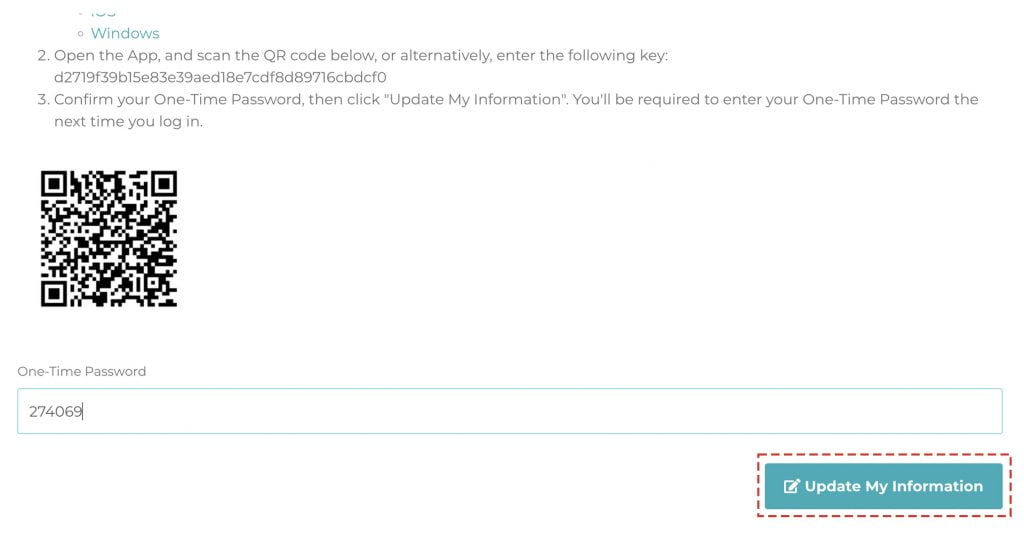
Congratulations! You have enabled the two-factor authentication for KnownHost’s billing account. Next time you log in, you will need to enter the 6-digit one-time password from the authentication application.
Conclusion
Secure your KnownHost’s billing account with an extra layer of Two-Factor Authentication security. We have elaborated on the easiest way to configure the 2FA for your billing account #TheMostSecuredHostingProvider.
KnownHost offers 365 days a year, 24 hours a day, all 7 days of the week best in class technical support. A dedicated team ready to help you with requests should you need our assistance. You’re not using KnownHost for the best webhosting experience? Well, why not? Check with our Sales team to see what can KnownHost do for you in improving your webhosting experience.